Hands-on: EventLoopAnalysisTemplate
Overview
Teaching: 0 min
Exercises: 40 minQuestions
What kind of anlaysis code should I use for analyzing flat ROOT nuples?
How can I build such a code?
Objectives
Learn the most simple way of accessing information from a ROOT flat ntuple file
Lear how to build a analysis skeleton
Disclaimer
During the hands-on sessions, there will be less talking from our side and more reading from yours. You should try to follow the instructions below in detail. If something is not clear, we are here to help. We will try to silently work on the same exercises as you, so we can keep up with possible questions or discussion.
What to do with the skimmed files
Ok, we got these files from here, now what?
- DYJetsToLL.root
- GluGluToHToTauTau.root
- Run2012B_TauPlusX.root
- Run2012C_TauPlusX.root
- TTbar.root
- VBF_HToTauTau.root
- W1JetsToLNu.root
- W2JetsToLNu.root
- W3JetsToLNu.root
Well, we need to do some analysis. I.e., we would like to apply selection cuts, make some checks maybe (if we were more serious, apply some corrections, calibrations, etc) before selecting some variables of interest and producing histograms. Just for references, comparing this to the original RDataFrame analysis, we would like to apply most of the selection criteria here and here so we can later use a modified version of this python script to make pretty plots. Of course these is a toy analysis. If you read the original publication, it has more selection requirements and include more decay channels.
In order to access the information stored now in the myoutput.root-kind of files (remember that they are the output of the POET), we need again some C++ code. The advantage of these files (over the AOD files before) is that they are essentially flat (we call them ntuples), i.e., they do not generally have a crazy/complicated structure like the AOD files (for which you required CMSSW libraries). They just need ROOT libraries to be analyzed. For this reason, and maybe this is a drawback, you do need ROOT.
Fortunately, you can work in your good old cmssw-opendata container (which has an old version of ROOT) or you could use a stand-alone ROOT container, like it was explained in the prep-work lesson.
We will stick to the cmssw-opendata container because we downloaded already the files above. If you couldn’t download them, it is possible to have access remotely, using the xrootd protocol, but this will be rather slow unless you are working on a newer ROOT stand-alone container. In any case the files are available at root://eospublic.cern.ch//eos/opendata/cms/upload/od-workshop/ws2021/
Getting a code skeleton for analysis
ROOT class, TTree, has some nice nice methods that can be used to extract a code skeleton. Let’s explore this just a bit and then we will present you with a fully functional template for our analysis.
Let’s try to open one of our skimmed files above. First jump-start your container and/or VM like you usually do (if you continue from the Demo episodo, then you do not have to do anything else):
docker start -i <name of container>
It would be best to move to the PhysObjectExtractorTool/PhysObjectExtractor/test/ (although this is not required):
cd PhysObjectExtractorTool/PhysObjectExtractor/test/
ROOT-open one of these files:
root -l Run2012B_TauPlusX.root
(or root -l root://eospublic.cern.ch//eos/opendata/cms/upload/od-workshop/ws2021/Run2012B_TauPlusX.root, if you are trying to access them remotely)
Let’s create a pointer to one of the Events tree in one of the directories (let’s choose muons), and then execute the MakeClass() method to obtain a code skeleton and then exit ROOT. We are naming the resulting C++ code simply “muons”
Attaching file Run2012B_TauPlusX.root as _file0...
root [1] TTree* tmuons = (TTree*)_file0->Get("mymuons/Events");
root [2] tmuons->MakeClass("muons")
Info in <TTreePlayer::MakeClass>: Files: muons.h and muons.C generated from TTree: Events
(Int_t)0
root [3] .q
This will generate a C++ Class with a header file, muons.h, and a source file, muons.C. Open these files and explore them quickly, try to make sense of what you see, but do not spend too much time on them. You will find that they are basically an empty skeleton with declarations and definitions that can be used to read the variables stored in our ntuple files, like Run2012B_TauPlusX.root.
Putting it all together a single analysis file
We can put the structure of these two files together and create a single analysis file, which we have call EventLoopAnalysisTemplate.cxx. This example is part of the POET infrastructure and it resides precisely in the directory you are currently at, i.e. PhysObjectExtractorTool/PhysObjectExtractor/test. You will probably have to update your repository with git pull to get the latest version. Alternatively, you can download it directly with wget https://raw.githubusercontent.com/cms-opendata-workshop/workshop2021-payload-analysisflow/master/EventLoopAnalysisTemplate.cxx
Let’s take a look and try to understand briefly how it works. Take your time and the instructor if there is something not clear. Then, we will compile and run it.
Open this EventLoopAnalysisTemplate.cxx file with an editor or simply look inside with the less command.
Since this will run compiled, let’s start with the main function:
//-----------------------------------------------------------------
int main()
{
//-----------------------------------------------------------------

  //To be able to read the trigger map
  gROOT->ProcessLine("#include<map>");


  //Compute event weights to be used for the respective datasets
  //const float integratedLuminosity = 4.412 * 1000.0; // Run2012B only
  //const float integratedLuminosity = 7.055 * 1000.0; // Run2012C only
  //const float integratedLuminosity = 11.467 * 1000.0; // Run2012B+C
  //const float mc_w = <xsec> / <#events> * integratedLuminosity;
  const float data_w = 1.0;

  map<string, pair<string,float> > sampleNames;
  //sampleNames.insert(make_pair("MCSample",make_pair("mc",mc_w)));
  sampleNames.insert(make_pair("myoutput",make_pair("data",data_w)));

  //loop over sample files with names  defined above
  for(map< string,pair<string,float> >::iterator it=sampleNames.begin();
      it!=sampleNames.end();it++){

    TString samplename = it->first;
    TString thelabel = it->second.first;
    Float_t sampleweight = it->second.second;

    TStopwatch time;
    time.Start();
    cout << ">>> Processing sample " << samplename <<" with label "<<thelabel<<" and weight "<<sampleweight<<":" <<endl;

    TString filename = samplesBasePath+samplename+".root";

    cout<<"Build the analysis object with file "<<filename<<endl;
    EventLoopAnalysisTemplate mytemplate(filename,thelabel,sampleweight);

    cout<<"Run the event loop"<<endl;
    mytemplate.Loop();
    time.Stop();
    time.Print();
  }

  TFile* hfile = new TFile("histograms.root","RECREATE");

  //Save signal region histos
  data_npv->Write();

  hfile->Close();

  return 0;

}
First, there is some loading of a map library happening in ROOT. This is necessary so the trigger information can be read. Then you will a block which is meant to take care of weights calculations. Of course, this is to handle simulated datasets. Besides, we already learned how to calculate luminosities.
Next there is a map which contains the sample name (in the case of this poet example, it is just myoutput) and then a pair formed by the dataset nickname, in this case data, and the weight of this data. Since these are real collisions, it is set defined as one above. We could add more samples to our analysis, just by adding entries to our map.
The next block is a loop over the samples in the map. The main thing to notice is that for each of these hypothetical samples, an EventLoopAnalysisTemplate object, called mytemplate, is created. The Class of this object is in its essence the same as the muon.h Class we explored above.
cout<<"Build the analysis object with file "<<filename<<endl;
EventLoopAnalysisTemplate mytemplate(filename,thelabel,sampleweight);
Finally, the evet loop is triggered with the Loop() method of the object.
mytemplate.Loop();
It is intuitive to think that the loop is over the events in the file.
Finally in the main function, a histogram is saved in a file called histograms.root.
Now, let’s look at the creation of the mytemplate object, which is is the heart of the analysis. Of course, this object is brought to life by the constructor of the EventLoopAnalysisTemplate Class:
//Constructor of the analysis class
EventLoopAnalysisTemplate::EventLoopAnalysisTemplate(TString thefile, TString thelabel, Float_t sampleweight) : fChain(0)
{
  //Prepare some info for the analysis object:
  filename = thefile;
  labeltag = thelabel;
  theweight = sampleweight;


  //Load histograms easy access
  //hast to be in agreement with above definitions.
  hists[0] = data_npv;

// if parameter tree is not specified (or zero), connect the file
// used to generate this class and read the Tree.
   TTree* tree = 0;
   TFile *f = TFile::Open(filename);
   //trigger should go first as it is the more complicated one
   tree = (TTree*)f->Get("mytriggers/Events");
   //Get trees for friendship
   tevents = (TTree*)f->Get("myevents/Events");
   tvertex = (TTree*)f->Get("mypvertex/Events");
   tmuons = (TTree*)f->Get("mymuons/Events");
   ttaus = (TTree*)f->Get("mytaus/Events");
   tmets = (TTree*)f->Get("mymets/Events");
   //Make friends so we can have access to friends variables
   //we may not use all of the available information
   //it is just an example
   tree->AddFriend(tevents);
   tree->AddFriend(tvertex);
   tree->AddFriend(tmuons);
   tree->AddFriend(ttaus);
   tree->AddFriend(tmets);
   Init(tree);
}
The file name of the sample, the nickname of the sample, and the weight are passed to this constructor. Compare this constructor with the definition of its Class:
class EventLoopAnalysisTemplate {
public :

  TTree          *fChain;   //!pointer to the analyzed TTree or TChain
  TTree          *ttrigger;
  TTree          *tevents;
  TTree          *tvertex;
  TTree          *tmuons;
  TTree          *ttaus;
  TTree          *tmets;
  Int_t          fCurrent; //!current Tree number in a TChain

  //for managing files and weights
  TString          labeltag;
  TString          filename;
  Float_t          theweight;

  //array to keep histograms to be written and easily loop over them
  TH1F            *hists[nhists];

  // Declaration of example leaf types
  Int_t           run;
  UInt_t          luminosityBlock;
  ULong64_t	   event;
  Int_t           PV_npvs;
  std::map<std::string, int> *triggermap;
  vector<float>   *muon_pt;

  // List of example branches
  TBranch        *b_run;   //!
  TBranch        *b_luminosityBlock;   //!
  TBranch        *b_event;   //!
  TBranch        *b_PV_npvs;   //!
  TBranch        *b_triggermap;   //!
  TBranch        *b_muon_pt;   //!

  EventLoopAnalysisTemplate(TString filename, TString labeltag, Float_t theweight);
  virtual ~EventLoopAnalysisTemplate();
  virtual Int_t    GetEntry(Long64_t entry);
  virtual Long64_t LoadTree(Long64_t entry);
  virtual void     Init(TTree *tree);
  virtual void     Loop();
  virtual Bool_t   Notify();
  virtual void     Show(Long64_t entry = -1);
  void analysis();
  bool MinimalSelection();

};
It is evident that what we are doing here is trying to get some of the information (most variables are missing as this is a minimal example) stored in our skimmed files. Most of the information is set to belong to this class, so as long as your are in its scope, those variables will be available for use.
Note one particular feature in the constructor. We get several of the Events trees in the corresponding directories of the root file from the POET skimmer. Of course, one can add more information if needed. The key aspect is to make them these trees friends so the event loop can access all the variables in all the trees.
The last line in the constructor is an Init function:
void EventLoopAnalysisTemplate::Init(TTree *tree)
{
   // The Init() function is called when the selector needs to initialize
   // a new tree or chain. Typically here the branch addresses and branch
   // pointers of the tree will be set.
   // It is normally not necessary to make changes to the generated
   // code, but the routine can be extended by the user if needed.
   // Init() will be called many times when running on PROOF
   // (once per file to be processed).

   // Set object pointer
   //In our case, only vectors and maps
   triggermap =0;
   muon_pt = 0;

   // Set branch addresses and branch pointers
   if (!tree) return;
   fChain = tree;
   fCurrent = -1;
   //Comment out to be able to read map
   //https://root-forum.cern.ch/t/std-map-in-ttree-with-makeclass/14171
   //fChain->SetMakeClass(1);

   fChain->SetBranchAddress("run", &run, &b_run);
   fChain->SetBranchAddress("luminosityBlock", &luminosityBlock, &b_luminosityBlock);
   fChain->SetBranchAddress("event", &event, &b_event);
   fChain->SetBranchAddress("PV_npvs", &PV_npvs, &b_PV_npvs);
   fChain->SetBranchAddress("triggermap",&triggermap,&b_triggermap);
   fChain->SetBranchAddress("muon_pt", &muon_pt, &b_muon_pt);
   Notify();
}
This is really where you tell ROOT where to look for the information in the analyzed files and where to store it. For example, you are asking ROOTsomething like: “read the branch (stored in a likewise object &b_muon_pt) called muon_pt from the current file and store it in my &muon_pt vector, which I already and declared and initialized above”. We give identical names following the traditional way in which he MakeClass() tool generates the skeletons (as you saw earlier).
You can see at the top that certain variables are defined globally for convenience:
//const std::string samplesBasePath = "root://eospublic.cern.ch//eos/opendata/cms/upload/od-workshop/ws2021/";
const string samplesBasePath = "";
//book example histograms for specific variables
//copy them in the constructor if you add more
const int nhists = 1;
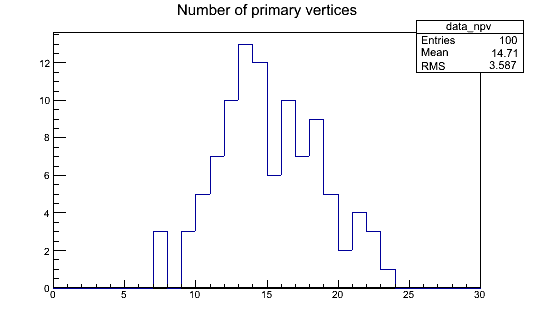
TH1F* data_npv = new TH1F("data_npv","Number of primary vertices",30,0,30);
//Requiered trigger
const string triggerRequest = "HLT_L2DoubleMu23_NoVertex_v*";
Histograms can be easily added there but are always copied to the hists[] array of the EventLoopAnalysisTemplate Class in order to able to loop over them and make the histogram filling mostly automatic.
Additionally, there are several other methods in the EventLoopAnalysisTemplate Class that take care of starting the event loop. Within the event loop, the analysis() method is executed:
//-----------------------------------------------------------------
void EventLoopAnalysisTemplate::analysis()
{
//-----------------------------------------------------------------

  //cout<<"analysis() execution"<<endl;

  //minimal selection with trigger requirement
  //if (!MinimalSelection()) return;

  //fill histogram
  Int_t histsize = sizeof(hists)/sizeof(hists[0]);
  for (Int_t j=0;j<histsize;++j){

    TString histname = TString(hists[j]->GetName());
    TString thelabel = histname(0,histname.First("_"));
    TString thevar = histname(histname.First("_")+1,histname.Sizeof());

    if (thelabel == labeltag){
      //primary vertices
      if(thevar == "npv"){
	       hists[j]->Fill(PV_npvs,theweight);
      }
    }
  }


}//------analysis()
This is where all the action should happen, as you could include selection cuts, like the MinimalSelection() example (which is just a simple trigger check), for your analysis. Mostly-automatic histogram filling, with appropriate weights, also takes place within this function.
Ok, enough of the theory, let’s compile. We can use the compiling line in the header (no need for a Makefile):
g++ -std=c++11 -g -O3 -Wall -Wextra -o EventLoopAnalysis EventLoopAnalysisTemplate.cxx $(root-config --cflags --libs)
Now we run. Note that it will run over the myoutput.root file that lives in your PhysObjectExtractorTool/PhysObjectExtractor/test area.
./EventLoopAnalysis
This will produce a histograms.root file, which should contain our data_npv histogram. You can open it with ROOT and take a look with the TBrowser:
Key Points
A simple analysis code skeleton can be obtained using ROOT tools
This skeleton can be enhanced to handle a particle physics analysis