Hands-on: Accessing your K8s cluster
Overview
Teaching: 0 min
Exercises: 45 minQuestions
How do I join the GCP project for these hands-on activities?
What GCP resources do I have?
How do I connect to my cluster?
Objectives
Log into the
CMS-opendataproject on the GCPIdentify the different resources and tools that come pre-installed with your cluster
Learn how to connect to your cluster
Introduction
Sign-in instructions
As it is possible to automate the process of creating resources in the cloud, we have built all the required resources for this tutorial in a GCP Project.
Here you will find some instructions on how to join this project, called
CMS-opendata, on the GCP. Please do follow that procedure in order for you to have access to your K8s cluster.
Your K8s cluster
Every one of you will have your own Kubernetes cluster already created. Remember we went through the trouble, yesterday, of creating the cluster by hand. We did not even finish because all the needed elements require some time (and knowledge) to be set up. The good news is that we have taken care of that for you.
Your cluster contains all the toys that you need to run some analysis workflow and extract the output. The most relevant are the access to a an abstraction of disk space, called pvc (persistent volume claim), and an http fileserver that will allow you to access from outside the files you will be producing in this disk. Also, some processes (in pods), which belong to this tool called Argo that we mentioned yesterday, are also running already on your cluster. This will allow you to execute workflows for your analysis.
Each participant has a special ID consisting from the first 7 letters of the participant’s email [0-9a-z]. All the resources you will see later reflect this fact:
Resources
- gce-nfs-disk-<ID>
cluster-<ID> (namespace “argo”)
- Deploymet/Service: nfs-server-<ID>
- Deploymet/Service: http-fileserver-<ID>
- Deploymet/Service: argo-server-<ID>
- PV/PVC: nfs-server-<ID>
For example, jo.hn2000@cern.ch has a cluster-john200 in the namespace argo and a process called nfs-server-john200 running on his cluster.
Remember, namespaces are reservations inside a K8s cluster. Argo gets installed within the
argoname space. Other than that, this will not influence our work in any visible way.
Connect to your cluster
First, notice, by looking at the top of your web browser, that you are already in the GCP CMS-opendata project.
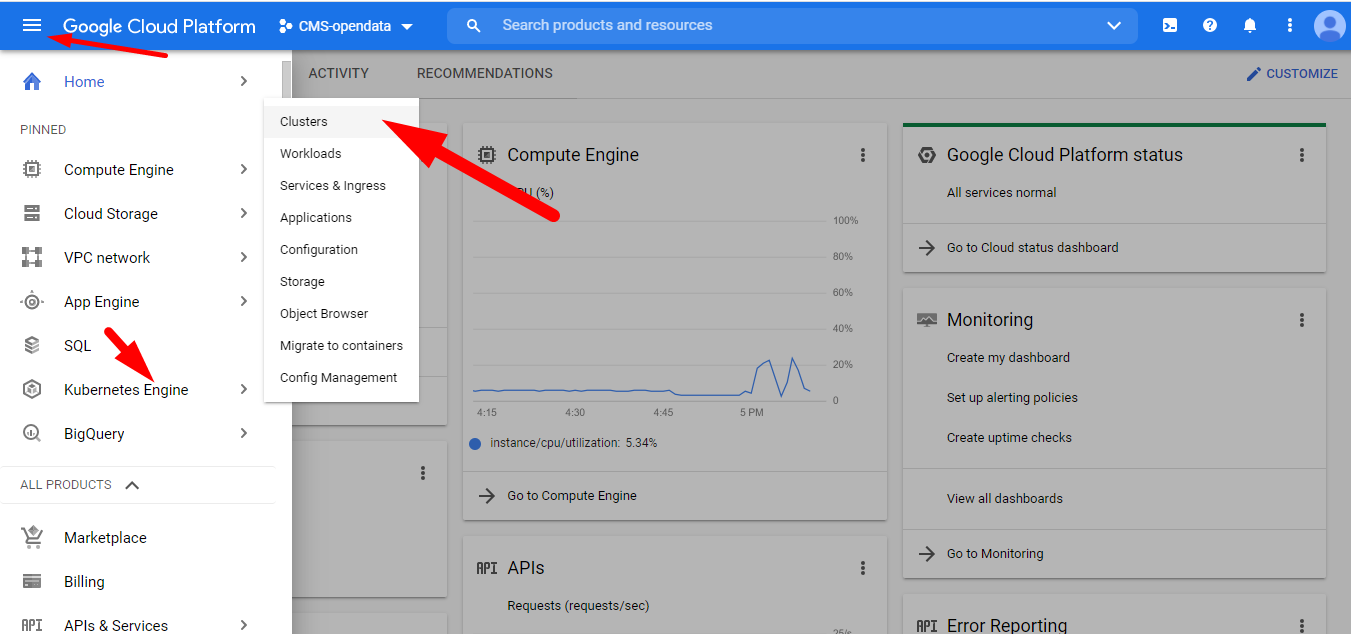
To connect to your cluster we are going to use the GCP CloudShell. Head to GCP > Kubernetes Engine > Clusters:
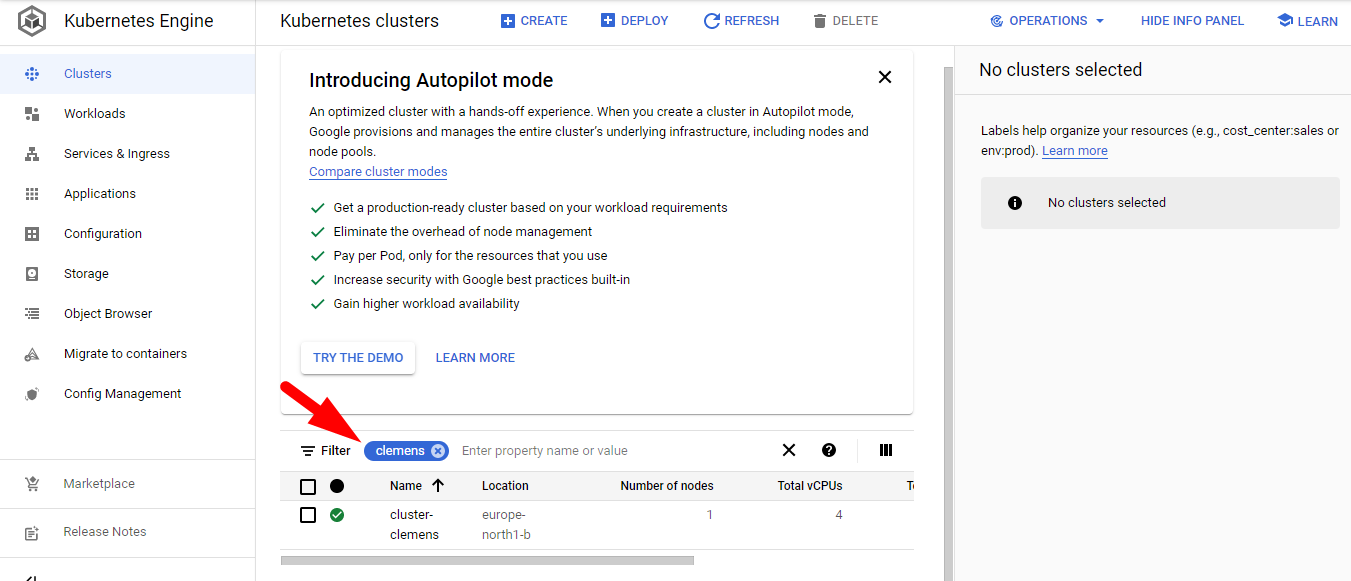
Remember
You can always use the filter with your ID to list only your resources
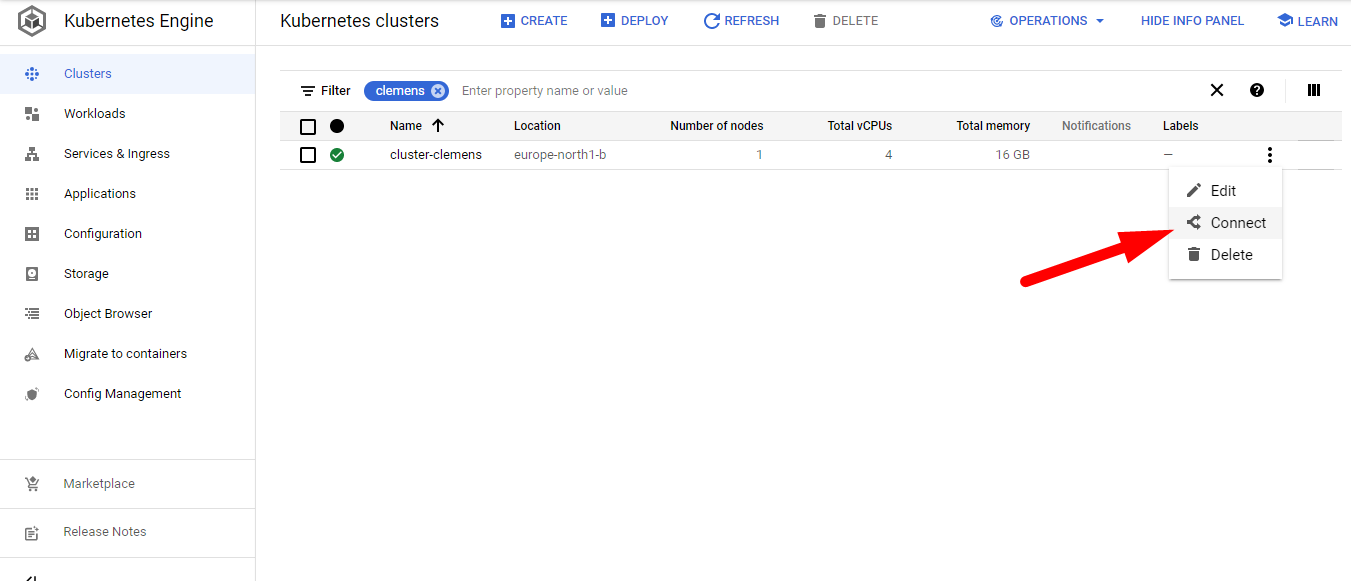
Find your cluster, press connect and choose RUN IN CLOUD SHELL at the emerging window. Then hit enter to execute the gcloud command that will connect you to your cluster.
Press Authorize if prompted to do so.
Getting to know your cluster
Let’s go to the Cloud Shell terminal and run some kubectl commands to verify that all the different resources are actually running on your cluster.
If you get disconnected from the terminal, just hit the Reconnect button.
Check the pods that are running under the namespace argo:
kubectl get pods -n argo
If you forget the namespace declaration,
-n argo, you will get null results. This is because all the elements were created under this namespace (with the exception of thepv, which is not namespaced).
NAME                                       READY   STATUS    RESTARTS   AGE
argo-server-edgarfe-64444f4574-brq7d       1/1     Running   2          10h
http-fileserver-edgarfe-5f8468d9fb-nvljz   1/1     Running   0          10h
minio-edgarfe-58ff684dbd-bbt5t             1/1     Running   0          10h
nfs-server-edgarfe-7ccc5c5fb8-gtbwb        1/1     Running   0          10h
postgres-6b5c55f477-5hqkj                  1/1     Running   0          10h
workflow-controller-7fb47d49bb-6l6wc       1/1     Running   2          10h
Note that there are two instances of the argo-server and its workflow-controller. This is, we presume, to make sure there is always this service available to listen and deal with the requested workflows the client might request.
Now, let’s check the persistent volume, pv, that was created globally (it is not namespaced) as an abstraction for the disk storage infrastructure:
kubectl get pv
NAME          CAPACITY   ACCESS MODES   RECLAIM POLICY   STATUS   CLAIM              STORAGECLASS   REASON   AGE
nfs-edgarfe   100Gi      RWX            Retain           Bound    argo/nfs-edgarfe   standard                12h
Our workflows will be claiming this persistent volume through a persistent volume claim, pvc, that has been also created for us in our argo namespace. Let’s check:
kubectl get pvc -n argo
NAME          STATUS   VOLUME        CAPACITY   ACCESS MODES   STORAGECLASS   AGE
nfs-edgarfe   Bound    nfs-edgarfe   100Gi      RWX            standard       10h
The Bound STATUS reflects the fact that is linked to the pv. A pvc can be claiming all the disk space available in the pv or only a fraction of it. In this case, we are claiming the whole disk: 100Gi.
Take note of the NAME of the
pvcas this will need to be referenced when trying to write to the disk it is linked to. Make sure you replace the name of the examples in this tutorial with the name of your own pvc.
Check the services running and the associated IP addresses:
kubectl get svc -n argo
NAME                          TYPE           CLUSTER-IP       EXTERNAL-IP     PORT(S)                      AGE
argo-server-edgarfe           LoadBalancer   10.122.199.159   34.88.193.217   2746:30307/TCP               10h
http-fileserver-edgarfe       LoadBalancer   10.122.206.111   35.228.53.183   80:32703/TCP                 10h
minio-edgarfe                 ClusterIP      10.122.201.144   <none>          9000/TCP                     10h
nfs-server-edgarfe            ClusterIP      10.122.206.212   <none>          2049/TCP,20048/TCP,111/TCP   10h
postgres                      ClusterIP      10.122.202.183   <none>          5432/TCP                     10h
workflow-controller-metrics   ClusterIP      10.122.199.13    <none>          9090/TCP                     10h
Take note of the
EXTERNAL-IPaddress for thehttp-fileserveras this is the address you will point your browser to in order to access any output files written to the mounted volumes.
You can point your browser to this IP address right now. You will find a familiar but empty tree structure. Your files will arrive there if written to the volumen(s) mounted with the pvc:

To remember
When exposing a server like this, with a public IP address, you get charged on GCP for the outgoing and incoming traffic.
Also take note of the
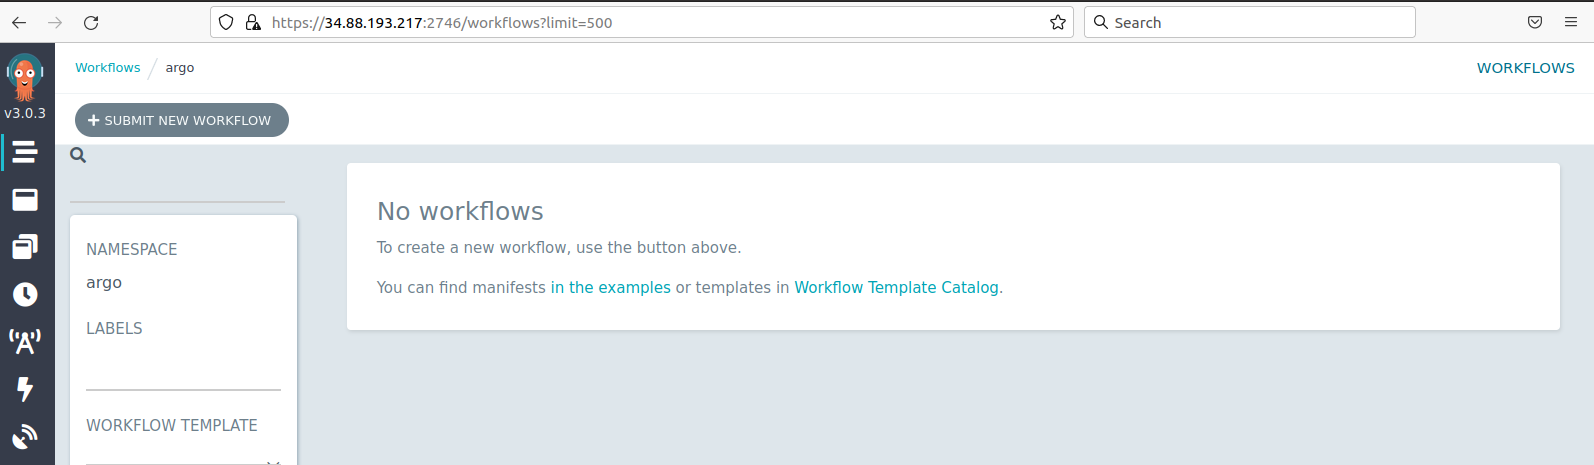
EXTERNAL-IPaddress for theargo-server..
If you point your browser to that IP address, formatted in this way https://34.88.193.217:2746 (replace your own IP; the port is always 2746), you will get access to the Argo GUI. It is a nice application to monitor you workflows. We will check it out later.
Do not mind the minio and the postgres processes, they come with the setup, but we are not going to use them.
Key Points
Once a cluster is created on the Kubernetes Engine, it is really simple to explore its elements.
Connection to the cluster can be achieved using the Cloud Shell.