Introduction
Overview
Teaching: 10 min
Exercises: 0 minQuestions
What is Kubernetes?
What is a Kubernetes cluster and why do I need one?
Objectives
Learn the very basics of Kubernetes
Learn a bit about the architecture of a Kubernetes cluster
Introduction:
Throughout this workshop, you have become familiar with Docker containers and their ability to function as isolated, efficient virtual machines running on a host machine. Considering this, imagine the potential of maximizing hardware resources by running multiple CMSSW (Compact Muon Solenoid Software) open data containers on a single desktop. For example, running 10 CMSSW containers, each processing a single root file, skimming through entire datasets, in parallel, simultaneously, and on your own machine. Scaling up to a larger number of machines introduces new challenges. How would you manage the software installation across all these machines? Do you have sufficient resources to handle these tasks? How would you effectively manage and monitor all the containers running across the distributed infrastructure?
These questions highlight the need for a robust orchestration system like Kubernetes. By leveraging Kubernetes, you can streamline and automate the deployment, scaling, and management of containers across multiple machines. Kubernetes provides a unified platform to address these challenges and ensures efficient utilization of computing resources, enabling researchers to focus on their analysis tasks rather than infrastructure management.
In the upcoming sections of this workshop, we will delve into the practical aspects of using Kubernetes for managing CMSSW containers and orchestrating data processing workflows. We will explore techniques for software deployment, container management, and effective utilization of distributed resources. By the end of the workshop, you will have gained the knowledge and skills to leverage Kubernetes for efficient and scalable physics data analysis.
Kubernetes (K8s) - Microservices Concepts
Kubernetes is a powerful container orchestration platform that facilitates the deployment, scaling, and management of microservices-based applications. Microservices architecture is an approach to developing software applications as a collection of small, independent services that work together to form a larger application. Kubernetes provides essential features and functionality to support the deployment and management of microservices.
/filters:no_upscale()/articles/distributed-systems-kubernetes/en/resources/13image006-1616431699209.jpg)
K8s API
The Kubernetes API (Application Programming Interface) is a set of rules and protocols that allows users and external systems to interact with a Kubernetes cluster. It serves as the primary interface for managing and controlling various aspects of the cluster, including deploying applications, managing resources, and monitoring the cluster’s state. Users can interact with the API using various methods, such as command-line tools (e.g., kubectl), programming languages (e.g., Python, Go), or through user interfaces built on top of the API.
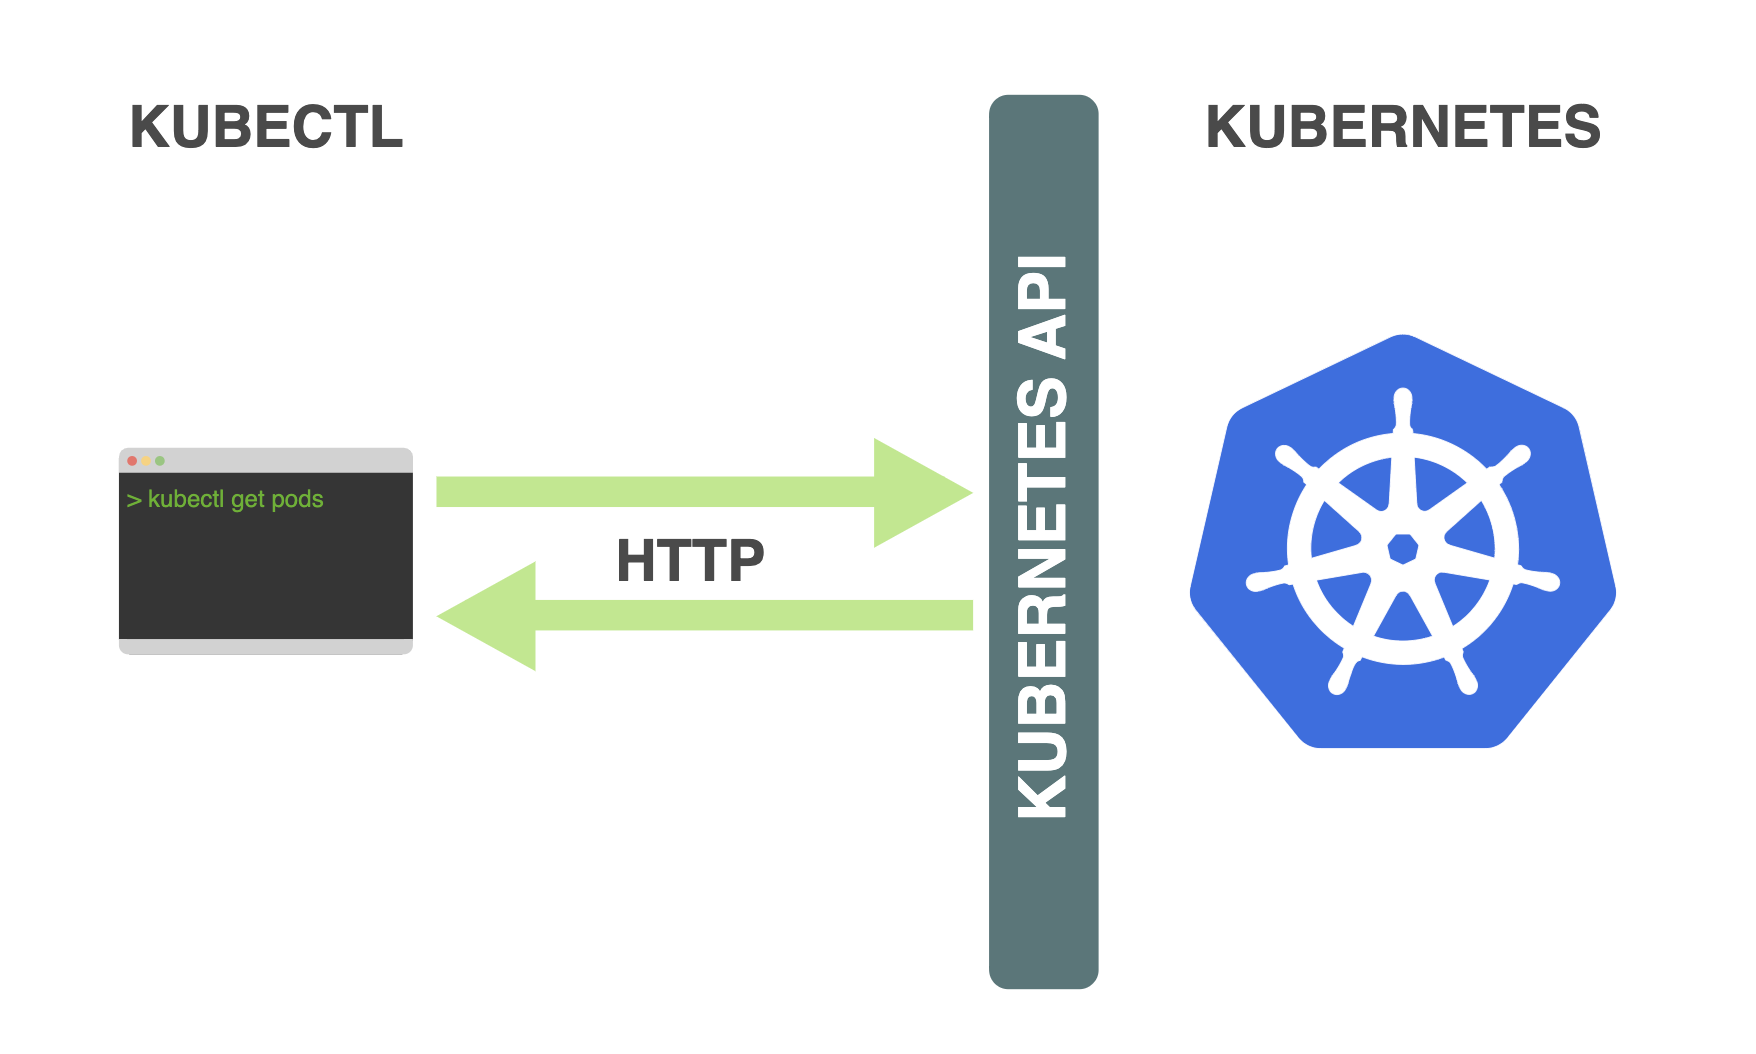
Kubernetes Components
When deploying Kubernetes, you establish a cluster that comprises two main components: masters and workers.
-
Master Nodes: Kubernetes masters are responsible for managing the control plane of the cluster. They coordinate and orchestrate the activities of the worker nodes and ensure the proper functioning of the entire cluster.
-
Worker Nodes: Worker nodes are the machines within the Kubernetes cluster that execute the actual application workloads. They host and run the Pods, which are the fundamental units of deployment in Kubernetes. Each Pod consists of one or more containers that work together to provide the desired functionality.
By separating the responsibilities of the masters and workers, Kubernetes ensures a distributed and scalable architecture. The masters focus on managing the cluster’s control plane and coordinating the overall state, while the workers handle the execution of application workloads. This division of labor allows for efficient scaling, fault tolerance, and high availability in a Kubernetes cluster.

Nodes Components
Kubernetes nodes, also referred to as worker nodes or simply nodes, are the individual machines or virtual machines that make up a Kubernetes cluster. These nodes are responsible for executing the actual workloads and running the containers that make up your applications. Each node in a Kubernetes cluster plays a crucial role in the distributed system and contributes to the overall functioning of the cluster. Here are the key characteristics and components of Kubernetes nodes:
-
Pods: In the Kubernetes world, pods are the smallest computing units. A pod represents a group of one or more containers that are deployed together on a node. Pods are fundamental to understanding Kubernetes architecture. However, when working with services, we typically work with a higher-level abstraction called deployments. Deployments automatically manage the creation and scaling of pods on our behalf.
-
Containers: Containers are lightweight and isolated environments that package applications and their dependencies, providing consistency and portability across different environments. In the context of pods, containers are the individual units that encapsulate the application components. These containers are typically extracted from Docker images, which are portable and self-contained units that include the application code, runtime, system tools, and libraries required to run the application.
-
Kubelet: The kubelet is the primary “node agent” that runs on each node in the Kubernetes cluster. It interacts with the cluster’s control plane to ensure that the containers described in the PodSpecs (pod specifications) are running and healthy.
-
Kube-Proxy: Kube-proxy is responsible for network proxying and load balancing within the Kubernetes cluster.
-
Container Runtime: The container runtime is responsible for managing the low-level operations of the containers, including image management, container creation, networking, and storage.
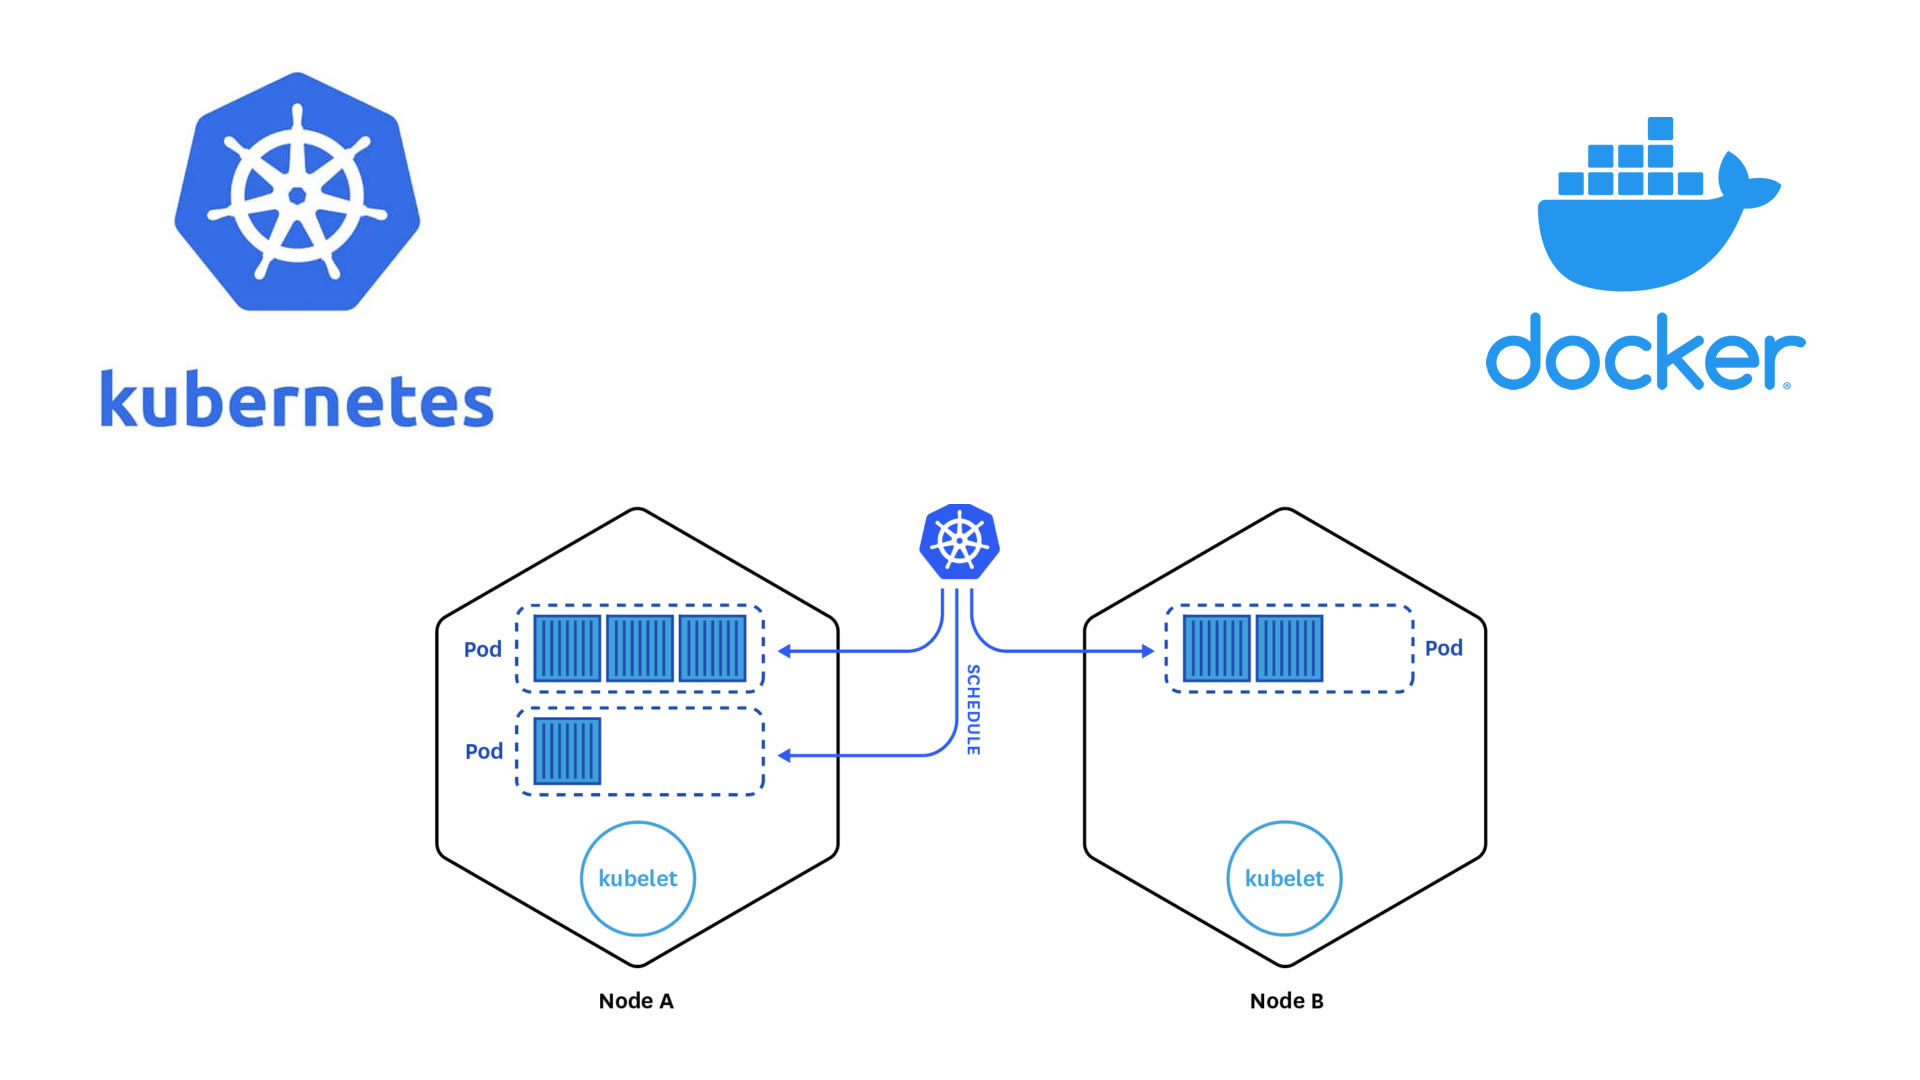
Nodes form the backbone of a Kubernetes cluster, offering the necessary computational resources for running applications. Working in collaboration with the master components, nodes play a crucial role in orchestrating, scheduling, and managing the lifecycle of containers and pods. By hosting and executing pods, nodes effectively utilize their compute resources, ensuring optimal execution, resource allocation, and scalability. With Kubernetes’ intelligent scheduling capabilities, containers are seamlessly distributed across nodes, enabling efficient resource utilization and facilitating fault tolerance in a distributed environment.
Autoscaling
Autoscaling is a powerful feature supported by Kubernetes that allows you to optimize the allocation of resources on your nodes based on the actual usage patterns of your applications. Kubernetes enables you to automatically scale up or down the number of nodes in your cluster, as well as adjust the CPU and memory resources allocated to those nodes.
By utilizing autoscaling, you can ensure that your applications have the necessary resources to handle increased workloads during peak times, while also dynamically reducing resource allocation during periods of lower demand. This flexibility not only improves performance and responsiveness but also helps optimize costs by allowing you to pay only for the resources you actually need. If you want to learn about pricing for this workshop’s cloud provider, check out Google’s Compute Engine pricing.
Key Points
Kubernetes is an orchestrator of containers. It is most useful when it is run in a cluster of computers.
Commercial K8s clusters are a good option for large computing needs.
We can run our containerized CMSSW jobs and subsequent analysis workflows in a K8s cluster.
Getting started with Kubectl
Overview
Teaching: 10 min
Exercises: 0 minQuestions
What is Kubectl?
How to use Kubectl commands?
Objectives
Learn what the kubectl command can do
Learn how to set up different services/resources to get the most of your cluster
K8s - Imperative vs Declarative programming
In the context of Kubernetes, imperative and declarative are two different paradigms used to define and manage the desired state of resources within a cluster. While imperative commands are useful for ad-hoc tasks or interactive exploration, the declarative approach is more suitable for managing and maintaining resources in a Kubernetes cluster efficiently. Let’s explore each approach! But first, we need a tool to interact with our cluster.
Kubectl
The kubectl command-line tool is a powerful utility provided by Kubernetes that allows you to interact with and manage Kubernetes clusters. Both Minikube and K8s on Docker Desktop come with a built-in kubectl installation. Use the following syntax to run kubectl commands from your terminal window:
kubectl [command] [TYPE] [NAME] [flags]
Where:
- command: Specifies the operation you want to perform on one or more Kubernetes resources. Some commonly used commands include
create,get,describe,delete,apply, andscale. Each command has its own set of options and subcommands. - TYPE: Indicates the type of Kubernetes resource you want to interact with. It can be a single resource type like
Pod, Deployment, Service, or a more general term likeall,nodes,namespaces, etc. - NAME: Specifies the name of the specific resource you want to operate on.
- flags: These are optional flags that modify the behavior of the command. Flags can be used to specify additional parameters, control output formats, apply labels, set resource limits, etc. Flags are specific to each command and can be listed by running
kubectl [command] --help.
Do not forget to go through the setup episode to get your environment up and running. Also, check out the kubectl cheat sheet.
Windows Users - Reminder
To enable Kubernetes on WSL2, you have two options: activating Kubernetes in Docker Desktop or installing Minikube following the Linux option on WSL2 Ubuntu. It’s important to note that the Windows instructions for the Minikube installation guide users to PowerShell, but running the CMSSW container there will cause issues. Therefore, it is necessary to execute those commands within the Ubuntu shell.
Docker desktop needs to be running in the background in order for Minikube to start. From a terminal with administrator access (but not logged in as root), run:
minikube startkubectl and it is pointing to some other environment, such as docker-desktop or a GKE cluster, ensure you change the context so that kubectl is pointing to minikube:
kubectl config use-context minikubeIf minikube fails to start, see the drivers page for help setting up a compatible container or virtual-machine manager.
Congratulations! You have successfully activated Minikube. You can now use Kubernetes to deploy and manage containerized applications on your local machine. Remember to familiarize yourself with Kubernetes concepts and commands to make the most of its capabilities.
- From the Docker Dashboard, select the Settings.
- Select Kubernetes from the left sidebar.
- Next to Enable Kubernetes, select the checkbox.
- Select Apply & Restart to save the settings and then click Install to confirm. This instantiates images required to run the Kubernetes server as containers, and installs the
/usr/local/bin/kubectlcommand on your machine.
kubectl and it is pointing to some other environment, such as minikube or a GKE cluster, ensure you change the context so that kubectl is pointing to docker-desktop:
kubectl config use-context docker-desktopkubectl get nodesCongratulations! You have successfully activated Docker Desktop Kubernetes. You can now use Kubernetes to deploy and manage containerized applications on your local machine. Remember to familiarize yourself with Kubernetes concepts and commands to make the most of its capabilities.
Imperative Approach
In the imperative approach, you specify the exact sequence of commands or actions to be performed to create or modify Kubernetes resources. You interact with the Kubernetes API by issuing explicit instructions.
Let’s first create a node running Nginx by using the imperative way.
Create the pod using the Imperative way
kubectl run mynginx --image=nginx
Get a list of pods and their status
kubectl get pods
Output
The status of the pod is “ContainerCreating,” which means that Kubernetes is currently in the process of creating the container for the pod. The “0/1” under the “READY” column indicates that the pod has not yet reached a ready state.
NAME      READY   STATUS              RESTARTS   AGE
mynginx   0/1     ContainerCreating   0          5s
Once the pod is successfully created and the container is running, the status will change to “Running” or a similar value, and the “READY” column will reflect that the pod is ready.
NAME      READY   STATUS              RESTARTS   AGE
mynginx   1/1     Running             0          70s
Get more info
kubectl get pods -o wide
Output
The updated output indicates that the pod named “mynginx” is now successfully running and ready to serve requests.
NAME      READY   STATUS    RESTARTS   AGE     IP             NODE       NOMINATED NODE   READINESS GATES
mynginx   1/1     Running   0          4m23s   10.244.0.122   minikube   <none>           <none>
kubectl describe pod mynginx
Output
The status of the pod is “ContainerCreating,” which means that Kubernetes is currently in the process of creating the container for the pod. The “0/1” under the “READY” column indicates that the pod has not yet reached a ready state.
Name:             mynginx                                     # Pod name
Namespace:        default                                     # Namespace of the Pod
Priority:         0                                           # Priority assigned to the Pod
Service Account:  default                                     # Service account used by the Pod
Node:             minikube/192.168.49.2                       # Node where the Pod is running
Start Time:       Thu, 01 Jun 2023 18:46:23 -0500             # Time when the Pod started
Labels:           run=mynginx                                 # Labels assigned to the Pod
Annotations:      <none>                                      # Annotations associated with the Pod
Status:           Running                                     # Current status of the Pod
IP:               10.244.0.122                                # IP address assigned to the Pod
IPs:
  IP:  10.244.0.122
Containers:
  mynginx:
    Container ID:   docker://c22dce8c953394...               # ID of the container
    Image:          nginx                                    # Image used by the container
    Image ID:       docker-pullable://nginx@sha256:af296b... # ID of the container image
    Port:           <none>                                   # Port configuration for the container
    Host Port:      <none>                                   # Host port configuration for the container
    State:          Running                                  # Current state of the container
      Started:      Thu, 01 Jun 2023 18:46:50 -0500          # Time when the container started
    Ready:          True                                     # Indicates if the container is ready
    Restart Count:  0                                        # Number of times the container has been restarted
    Environment:    <none>                                   # Environment variables set for the container
    Mounts:
      /var/run/secrets/kubernetes.io/serviceaccount from...  # Mount points for the container
Conditions:
  Type              Status                                    # Various conditions related to the Pod's status
  Initialized       True                                      # Pod has been initialized
  Ready             True                                      # Pod is ready
  ContainersReady   True                                      # Containers are ready
  PodScheduled      True                                      # Pod has been scheduled
Volumes:
  kube-api-access-hvg8b:                                      # Volumes used by the Pod
    Type:                    Projected
    TokenExpirationSeconds:  3607
    ConfigMapName:           kube-root-ca.crt
    ConfigMapOptional:       <nil>
    DownwardAPI:             true
QoS Class:                   BestEffort                         # Quality of service class for the Pod
Node-Selectors:              <none>                             # Node selectors for the Pod
Tolerations:                 node.kubernetes.io/not-ready:NoExecute op=Exists for 300s
                             node.kubernetes.io/unreachable:NoExecute op=Exists for 300s
Events:
  Type    Reason     Age    From               Message         # Events related to the Pod
  ----    ------     ----   ----               -------
  Normal  Scheduled  7m32s  default-scheduler  Successfully assigned default/mynginx to minikube
  Normal  Pulling    7m32s  kubelet            Pulling image "nginx"
  Normal  Pulled     7m5s   kubelet            Successfully pulled image "nginx" in 26.486269096s (26.486276637s including waiting)
  Normal  Created    7m5s   kubelet            Created container mynginx
  Normal  Started    7m5s   kubelet            Started container mynginx
Delete the pod
kubectl delete pod mynginx
Declarative Approach
In the declarative approach, you define the desired state of Kubernetes resources in a declarative configuration file (e.g., YAML or JSON). Rather than specifying the steps to achieve that state, you describe the desired outcome and let Kubernetes handle the internal details.
Create a pod using the declarative way
Download the file:
wget https://cms-opendata-workshop.github.io/workshop2023-lesson-introcloud/files/kubectl/myapp.yaml
YAML File
This YAML file describes a Pod with an nginx web server container that listens on port 80 and has an environment variable set. The specific behavior and functionality of the nginx web server will depend on the configuration of the nginx image used.
# myapp.yaml
apiVersion: v1
kind: Pod
metadata:
  name: myapp-pod
spec:
  containers:
  - name: nginx-container
    image: nginx
    ports:
    - containerPort: 80
    env:
    - name: DBCON
      value: myconnectionstring
Now, let’s create a pod using the YAML file
kubectl create -f myapp.yaml
Get some info
kubectl get pods -o wide
kubectl describe pod myapp-pod
Open a shell in the running pod
kubectl exec -it myapp-pod -- bash
Output
We used the command to execute an interactive shell session within the “myapp-pod” pod. After executing this command, you are now inside the pod and running commands as the “root” user. The prompt “root@myapp-pod:/#” indicates that you are currently in the pod’s shell environment and can run commands.
root@myapp-pod:/#
Print the DBCON environment variable that was set in the YAML file.
echo $DBCON
Output
The command “echo $DBCON” is used to print the value of the environment variable “DBCON”.
root@myapp-pod:/# echo $DBCON
myconnectionstring
Exit from the container
exit
Delete the pod
kubectl delete -f myapp.yaml
The declarative approach is the recommended way to manage resources in Kubernetes. It promotes consistency, reproducibility, and automation. You can easily version control the configuration files, track changes over time, and collaborate with team members more effectively.
Let’s run a few examples.
Kubernetes namespaces partition resources in a cluster, creating isolated virtual clusters. They allow multiple teams or applications to coexist while maintaining separation and preventing conflicts.
Get the currently configured namespaces:
kubectl get namespaces
kubectl get ns
Both commands are equivalent and will retrieve the list of namespaces in your Kubernetes cluster.
Get the pods list:
Get a list of all the installed pods.
kubectl get pods
You get the pods from the default namespace. Try getting the pods from the docker namespace. You will get a different list.
kubectl get pods -n kube-system
Output
The command “kubectl get pods –namespace=kube-system” is used to retrieve information about the pods running in the “kube-system” namespace.
NAME                               READY   STATUS    RESTARTS        AGE
coredns-787d4945fb-62wpc           1/1     Running   9 (4d19h ago)   34d
etcd-minikube                      1/1     Running   8 (4d19h ago)   34d
kube-apiserver-minikube            1/1     Running   9 (4d19h ago)   34d
kube-controller-manager-minikube   1/1     Running   9 (4d19h ago)   34d
kube-proxy-hm78n                   1/1     Running   8 (4d19h ago)   34d
kube-scheduler-minikube            1/1     Running   8 (4d19h ago)   34d
storage-provisioner                1/1     Running   16 (18m ago)    34d
Get nodes information:
Get a list of all the installed nodes. Using Docker Desktop or Minikube, there should be only one.
kubectl get nodes
Get some info about the node.
kubectl describe node
Output
The output provides details about each node, including its name, status, roles, age, and version.
NAME       STATUS   ROLES           AGE   VERSION
minikube   Ready    control-plane   34d   v1.26.3
Run your first deployment
A Deployment is a higher-level resource that provides declarative updates and manages the deployment of Pods. It allows you to define the desired state of your application, including the number of replicas, container images, and resource requirements.
Download the file:
wget https://cms-opendata-workshop.github.io/workshop2023-lesson-introcloud/files/kubectl/deploy-example.yaml
YAML File
This Deployment will create and manage three replicas of an nginx container based on the nginx:alpine image. The Pods will have resource requests and limits defined, and the container will expose port 80. The Deployment ensures that the desired state of the replicas is maintained, managing scaling and updating as needed.
# deploy-example.yaml
apiVersion: apps/v1
kind: Deployment
metadata:
  name: deploy-example
spec:
  replicas: 3
  revisionHistoryLimit: 3
  selector:
    matchLabels:
      app: nginx
      env: prod
  template:
    metadata:
      labels:
        app: nginx
        env: prod
    spec:
      containers:
      - name: nginx
        image: nginx:alpine
        resources:
          requests:
            cpu: 100m
            memory: 128Mi
          limits:
            cpu: 250m
            memory: 256Mi
        ports:
        - containerPort: 80
Create the Deployment:
kubectl apply -f deploy-example.yaml
Get the pods list
kubectl get pods -o wide
Output
Deployments are Kubernetes resources that manage the lifecycle of replicated pods, ensuring high availability, scalability, and automated healing, while ReplicaSets are used by deployments to maintain a desired number of pod replicas, enabling rolling updates and fault tolerance.
NAME                             READY   STATUS              RESTARTS   AGE   IP       NODE       NOMINATED NODE   READINESS GATES
deploy-example-54fbc9897-56s28   0/1     ContainerCreating   0          4s    <none>   minikube   <none>           <none>
deploy-example-54fbc9897-9twh8   0/1     ContainerCreating   0          4s    <none>   minikube   <none>           <none>
deploy-example-54fbc9897-lng78   0/1     ContainerCreating   0          4s    <none>   minikube   <none>           <none>
All three pods are currently in the “ContainerCreating” state, indicating that the containers are being created for these pods. After some time you will get:
NAME                             READY   STATUS    RESTARTS   AGE   IP             NODE       NOMINATED NODE   READINESS GATES
deploy-example-54fbc9897-56s28   1/1     Running   0          42s   10.244.0.126   minikube   <none>           <none>
deploy-example-54fbc9897-9twh8   1/1     Running   0          42s   10.244.0.124   minikube   <none>           <none>
deploy-example-54fbc9897-lng78   1/1     Running   0          42s   10.244.0.125   minikube   <none>           <none>
Get more details about the pod
kubectl describe pod deploy-example
Output
The output shows three running pods named “deploy-example-54fbc9897-56s28”, “deploy-example-54fbc9897-9twh8”, and “deploy-example-54fbc9897-lng78” in the “default” namespace. These pods are controlled by the ReplicaSet “deploy-example-54fbc9897” and are running the “nginx:alpine” image. They have successfully pulled the image, created the container, and started running. Each pod has an IP assigned, and they are running on the “minikube” node.
Get the Deployment info
kubectl get deploy
Output
All 3 replicas are ready, up-to-date, and available, indicating that the deployment is successfully running.
NAME             READY   UP-TO-DATE   AVAILABLE   AGE
deploy-example   3/3     3            3           4m57s
Get the ReplicaSet name:
A ReplicaSet is a lower-level resource that ensures a specified number of replicas of a Pod are running at all times.
kubectl get rs
Output
The current replica count matches the desired count, indicating that the ReplicaSet has successfully created and maintained 3 replicas. All 3 replicas are ready and available.
NAME                       DESIRED   CURRENT   READY   AGE
deploy-example-54fbc9897   3         3         3       6m12s
In summary, a Deployment provides a higher-level abstraction for managing and updating the desired state of Pods, while a ReplicaSet is a lower-level resource that ensures the specified number of Pod replicas are maintained. Deployments use ReplicaSets under the hood to achieve the desired state and handle scaling and rolling updates.
Cleanup
Delete the pod
kubectl delete -f deploy-example.yaml
Key Points
kubectlis the ruler of GKE
Getting started with Argo
Overview
Teaching: 10 min
Exercises: 0 minQuestions
What is Argo?
How to use Argo commands?
What are Argo workflows?
How do I deploy my Argo GUI?
Objectives
Appreciate the necessity for the Argo workflows tool (or similar)
Learn the basics of Argo commands
Argo
Argo is a collection of open-source tools that extend the functionality of Kubernetes, providing several benefits for workflow management. Some key advantages of using Argo include:
- Cloud Agnostic: Argo can be deployed on any Kubernetes cluster, irrespective of the underlying cloud provider.
- Resource Monitoring: Argo enables constant monitoring of resource states, allowing users to track the progress and status of their workflows.
- Scalability: Argo supports the execution of multiple jobs simultaneously across different nodes, providing high scalability.
- Error Debugging: With Argo, it is easier to identify and debug errors in workflows, ensuring smooth execution.
In the context of Argo, there are three important tools that facilitate working with workflows, we will be using the Argo Workflow Engine.
Install the Argo Workflows CLI
Download the latest Argo CLI from the releases page. This is a requirement to interact with argo.
Verify the Argo installation with:
argo version
Argo Workflow Engine
The Argo Workflow Engine is designed to execute complex job orchestration, including both serial and parallel execution of stages, with each stage executed as a container.
In the context of scientific analysis, such as physics analysis using datasets from the CMS Open Data portal and CMSSW, Argo’s orchestration capabilities are particularly valuable. By leveraging Argo, researchers can automate and streamline complex analysis workflows, which often involve multiple processing stages and dependencies. Argo’s support for parallel execution and container-based environments allows for efficient utilization of computational resources, enabling faster and more scalable data analysis.
Install argo as a workflow engine
While jobs can be run manually, utilizing a workflow engine like Argo simplifies the process of defining and submitting jobs. In this tutorial, we will use the Argo Quick Start page to install and configure Argo in your working environment.
Install it into your working environment with the following commands (all commands to be entered into your local shell):
kubectl create ns argo
kubectl apply -n argo -f https://raw.githubusercontent.com/argoproj/argo-workflows/master/manifests/quick-start-postgres.yaml
Check that everything has finished running before continuing with:
kubectl get all -n argo
Port-forward the UI
To open a port-forward so you can access the UI, open a new shell and run:
kubectl -n argo port-forward deployment/argo-server 2746:2746
This will serve the UI on https://localhost:2746. Due to the self-signed certificate, you will receive a TLS error which you will need to manually approve. The Argo interface has the following similiarity:
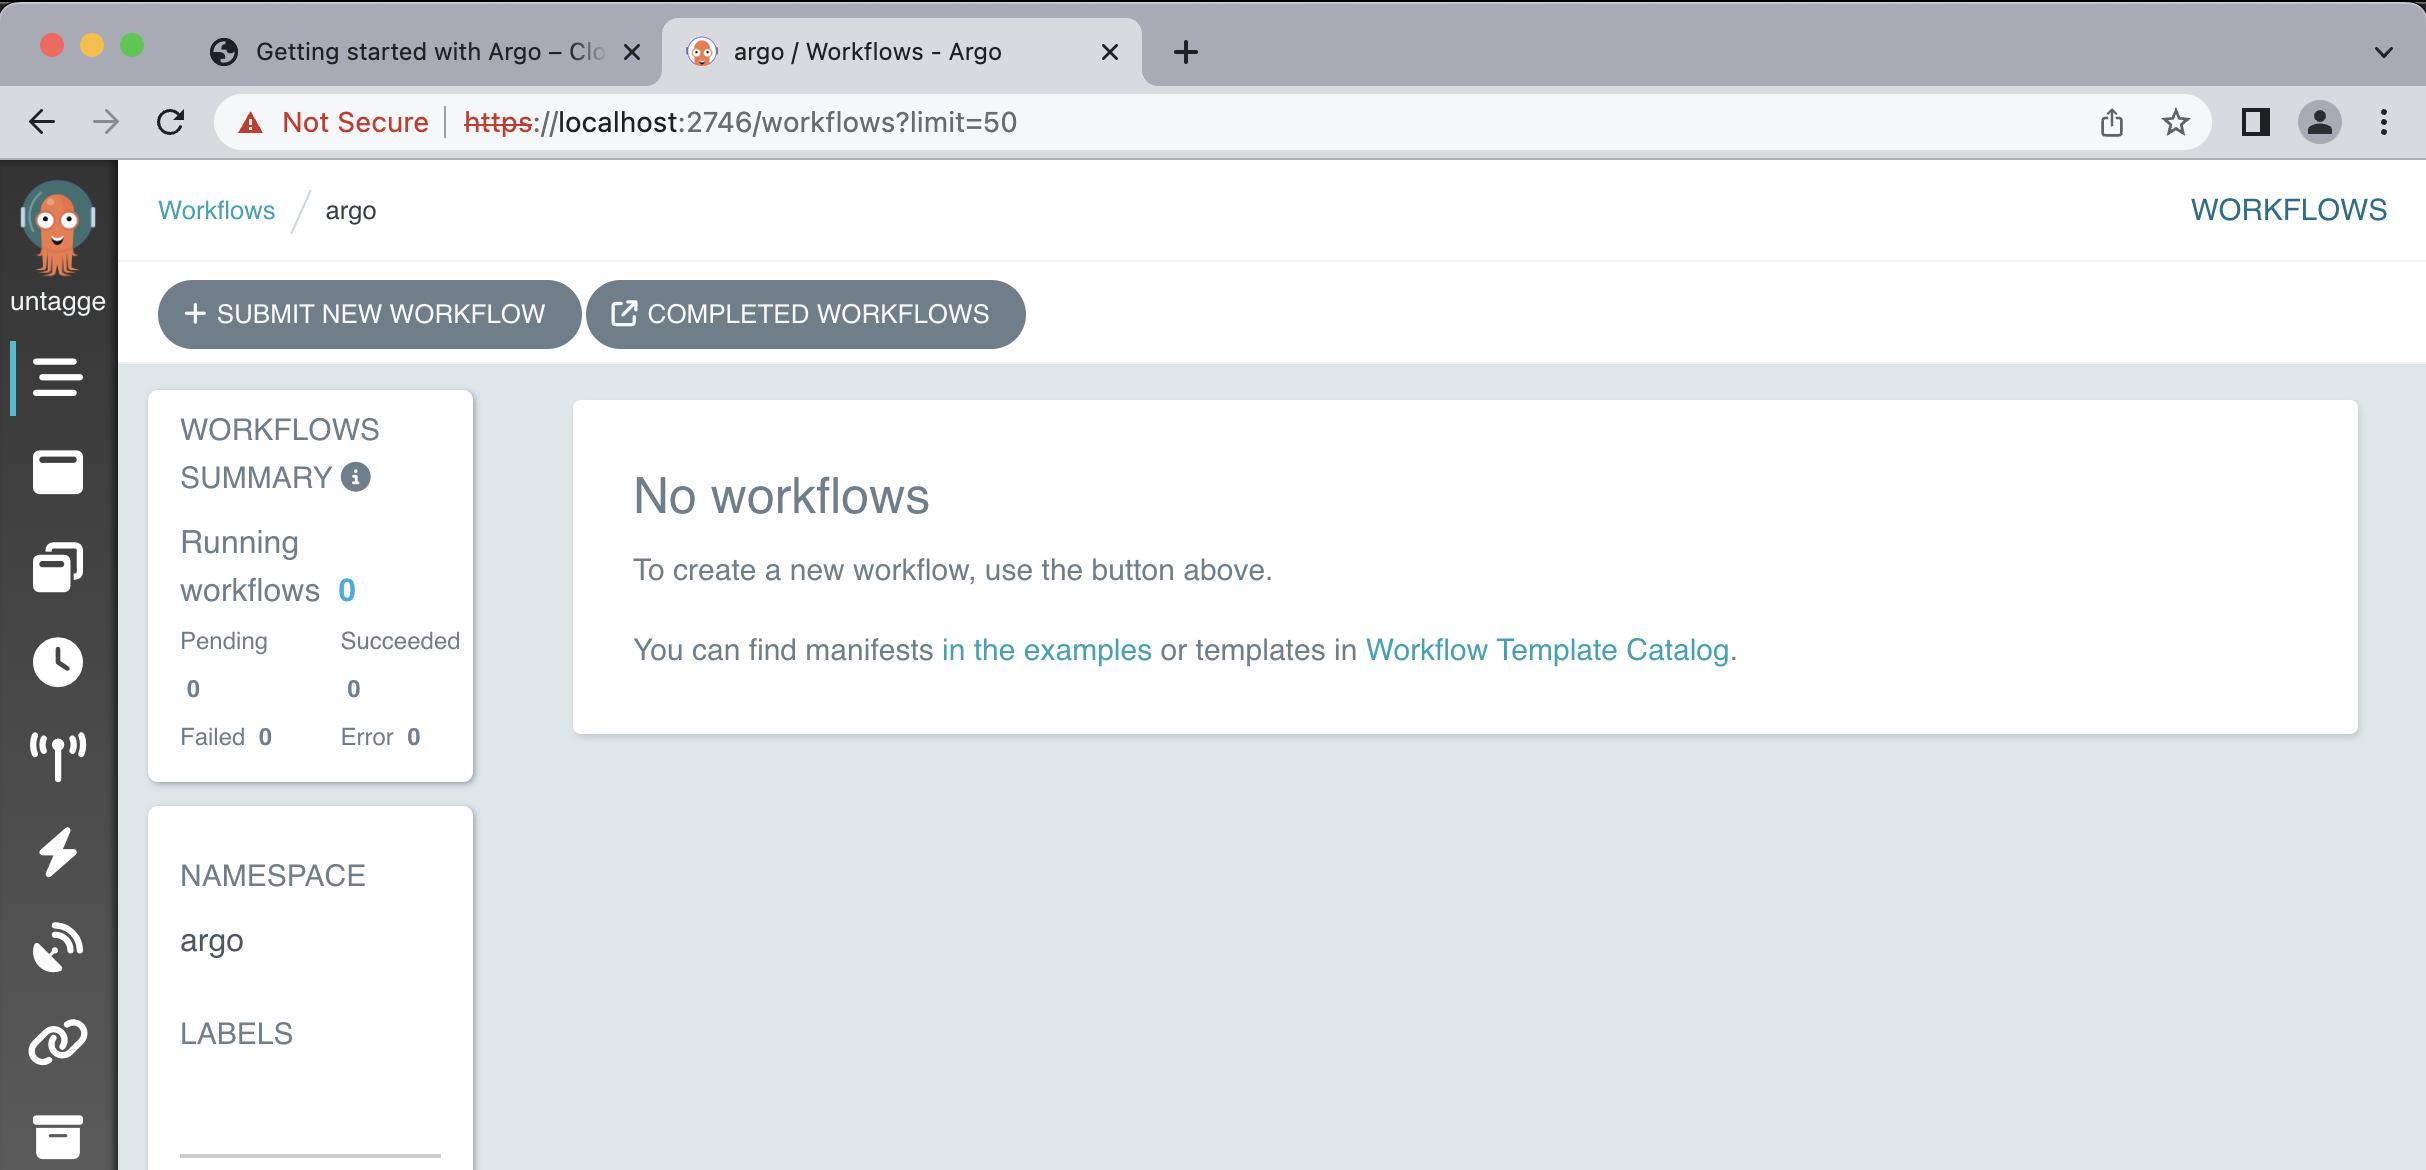
In the Argo GUI, you can perform various operations and actions related to managing and monitoring Argo Workflows. Here are some of the things you can do in the Argo GUI with Argo Workflows:
- View Workflows
- Submit Workflows
- Monitor Workflow Status
- Inspect Workflow Details
- View Workflow Logs
- Re-run Workflows
- Cancel Workflows
- Visualize Workflow DAG (Directed Acyclic Graph)
- Manage Workflow Templates
Pay close attention to the URL. It uses
httpsand nothttp. Navigating tohttp://localhost:2746result in server-side error that breaks the port-forwarding.
Run a simple test workflow
Make sure that all argo pods are running before submitting the test workflow:
kubectl get pods -n argo
You must get a similar output:
NAME                                  READY   STATUS      RESTARTS        AGE
argo-server-76f9f55f44-9d6c5          1/1     Running     6 (5d14h ago)   23d
httpbin-7d6678b4c5-vhk2k              1/1     Running     3 (5d14h ago)   23d
minio-68dc5544c4-8jst4                1/1     Running     3 (5d14h ago)   23d
postgres-6f9cb49458-sc5fx             1/1     Running     3 (5d14h ago)   23d
workflow-controller-769bfc84b-ndgp7   1/1     Running     8 (13m ago)     23d
To test the setup, run a simple test workflow with:
argo submit -n argo https://raw.githubusercontent.com/argoproj/argo/master/examples/hello-world.yaml
This might take a while, to see the status of our workflows run:
argo list @latest -n argo
Output
The output you provided indicates that there is a pod named “hello-world-mjgvb” that has a status of “Succeeded”. The pod has been running for 2 minutes, and it took 32 seconds to complete its execution. The priority of the pod is 0, and there is no specific message associated with it.
NAME                STATUS      AGE   DURATION   PRIORITY   MESSAGE
hello-world-mjgvb   Succeeded   2m    32s        0
You will be able to get an interactive glimpse of how argo workflow can be monitored and managing with Argo GUI, feel free to explore the various function this tool offers!
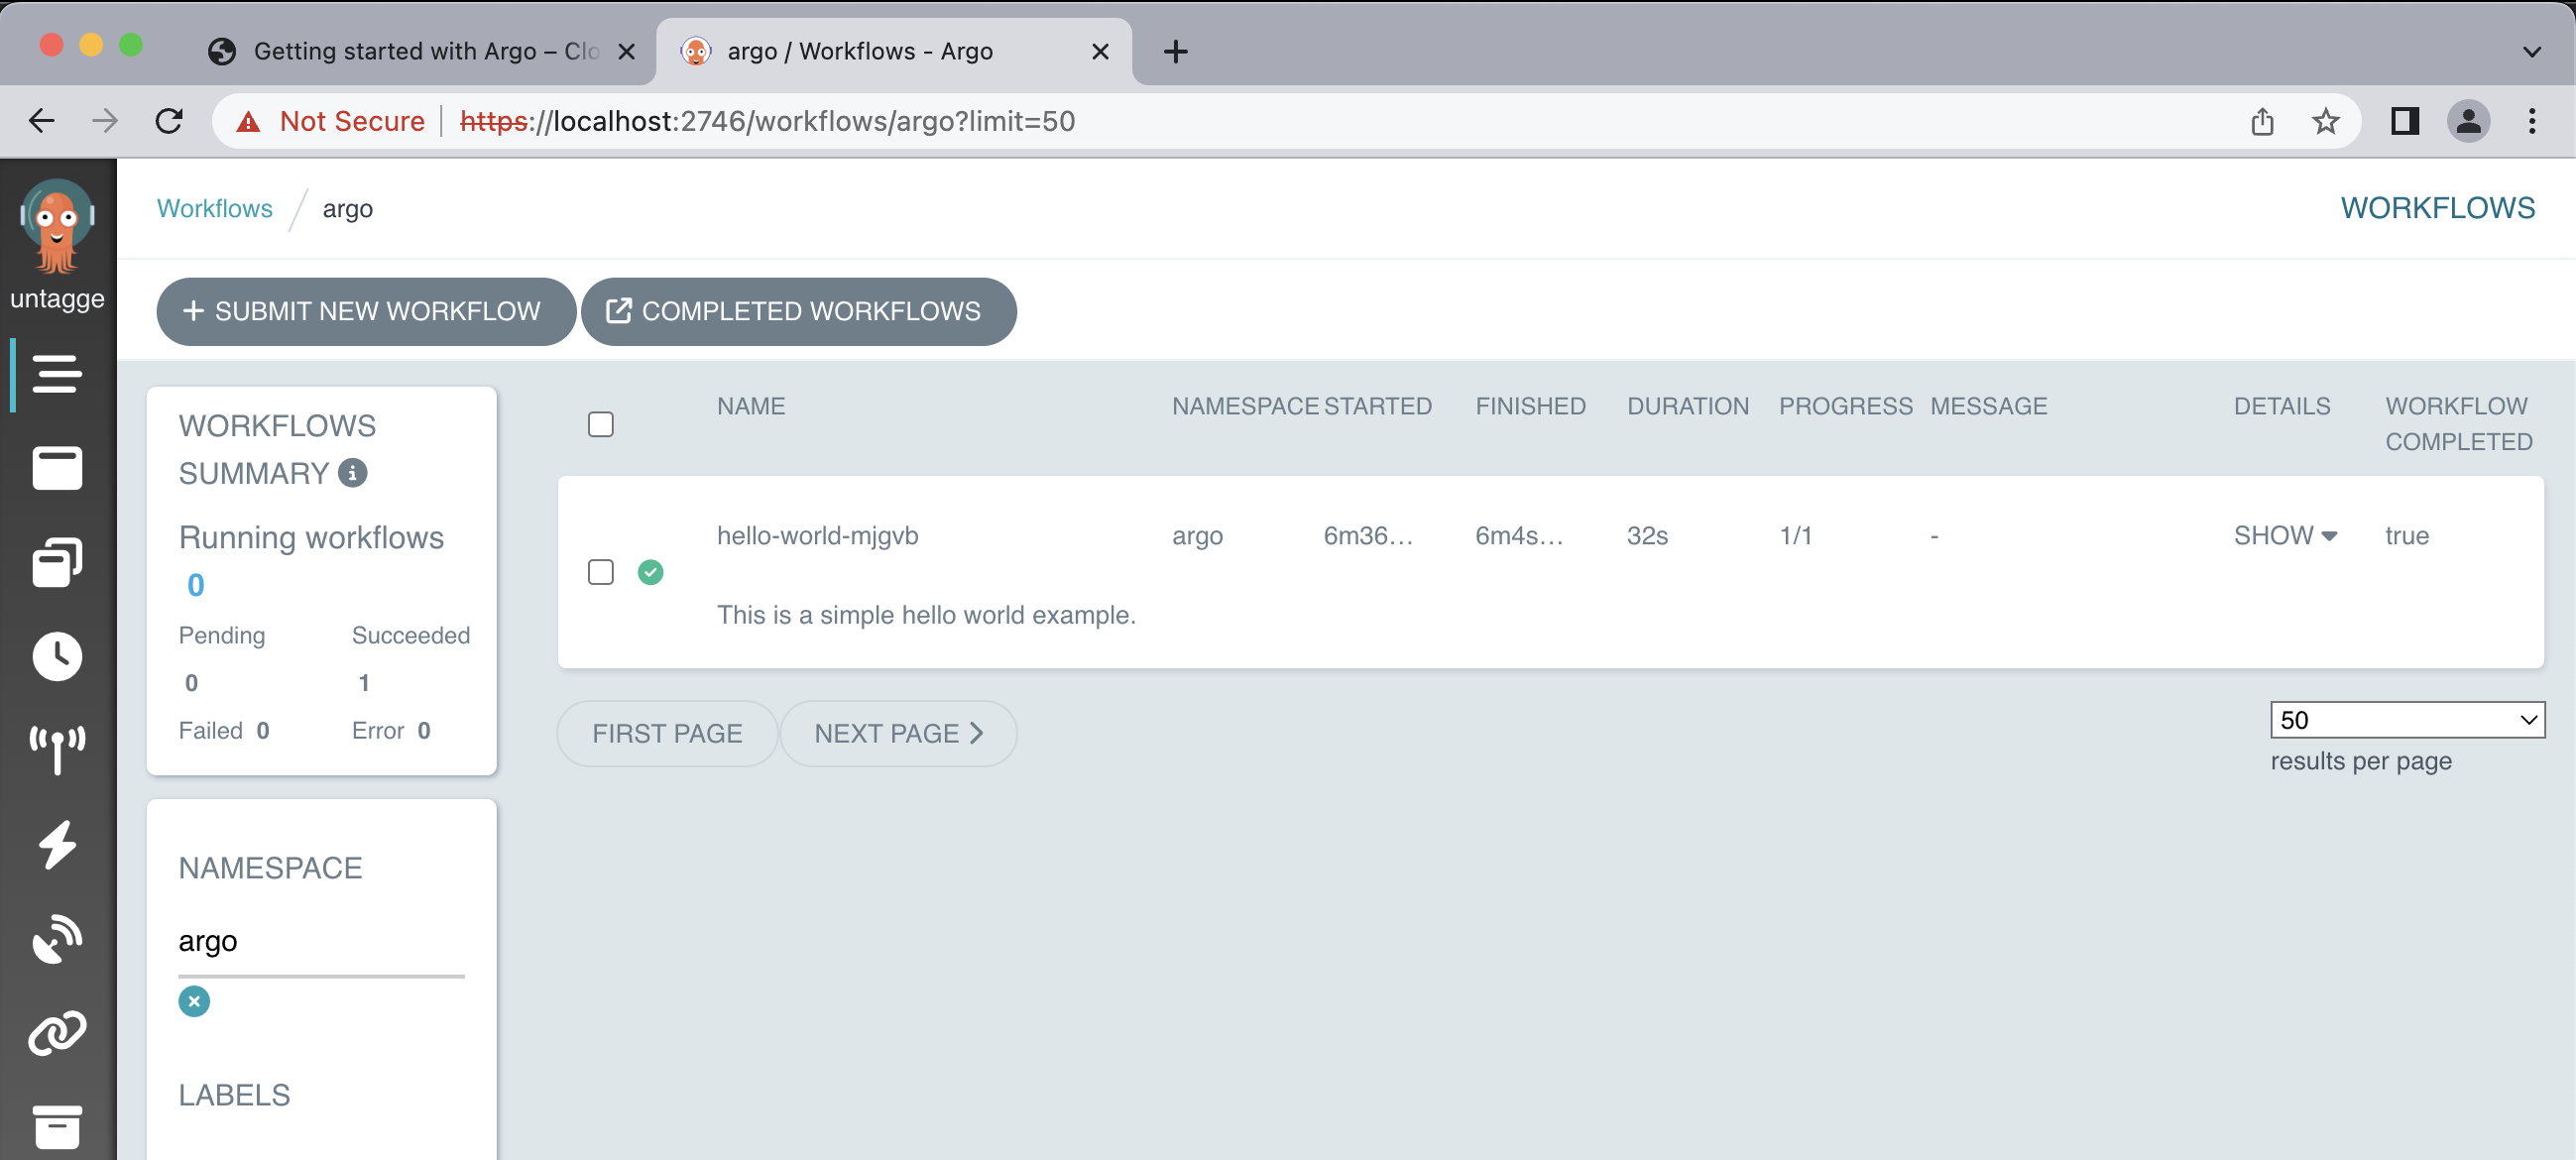
Within your workflow, you can select your pod (in this example, it’s called hello-world-mjgvb) to get a quick summary of the workflow details.
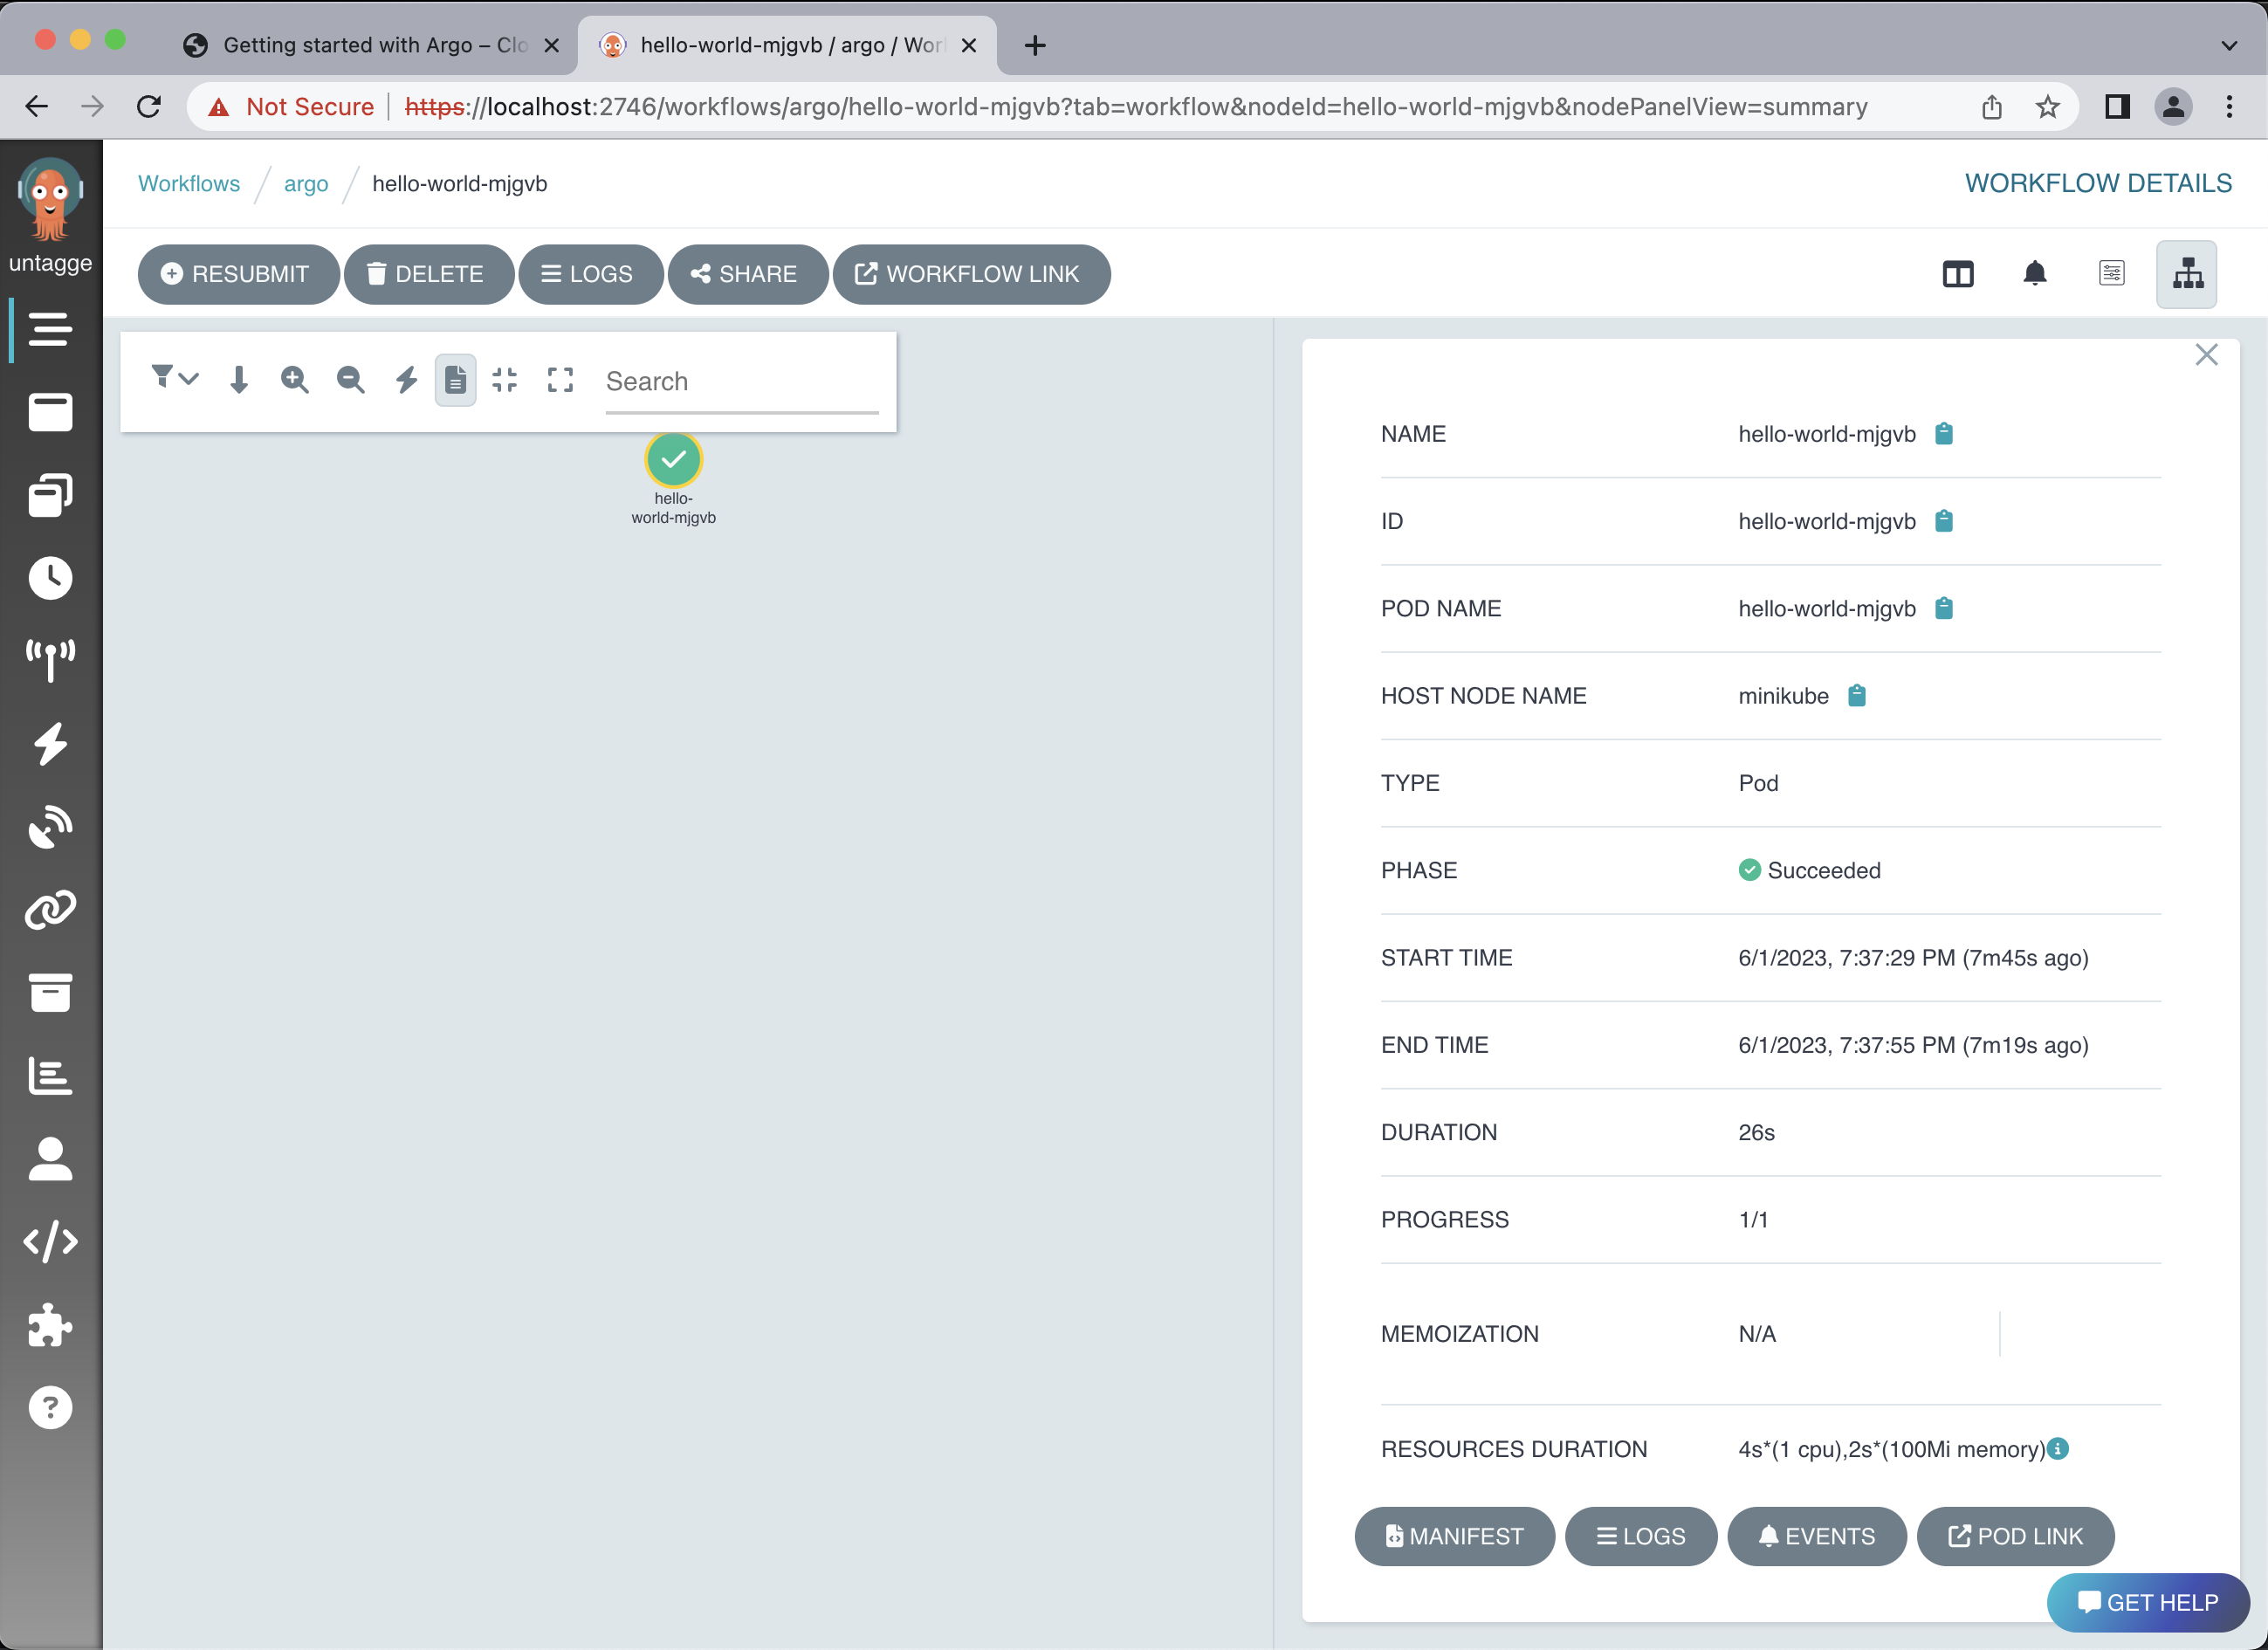
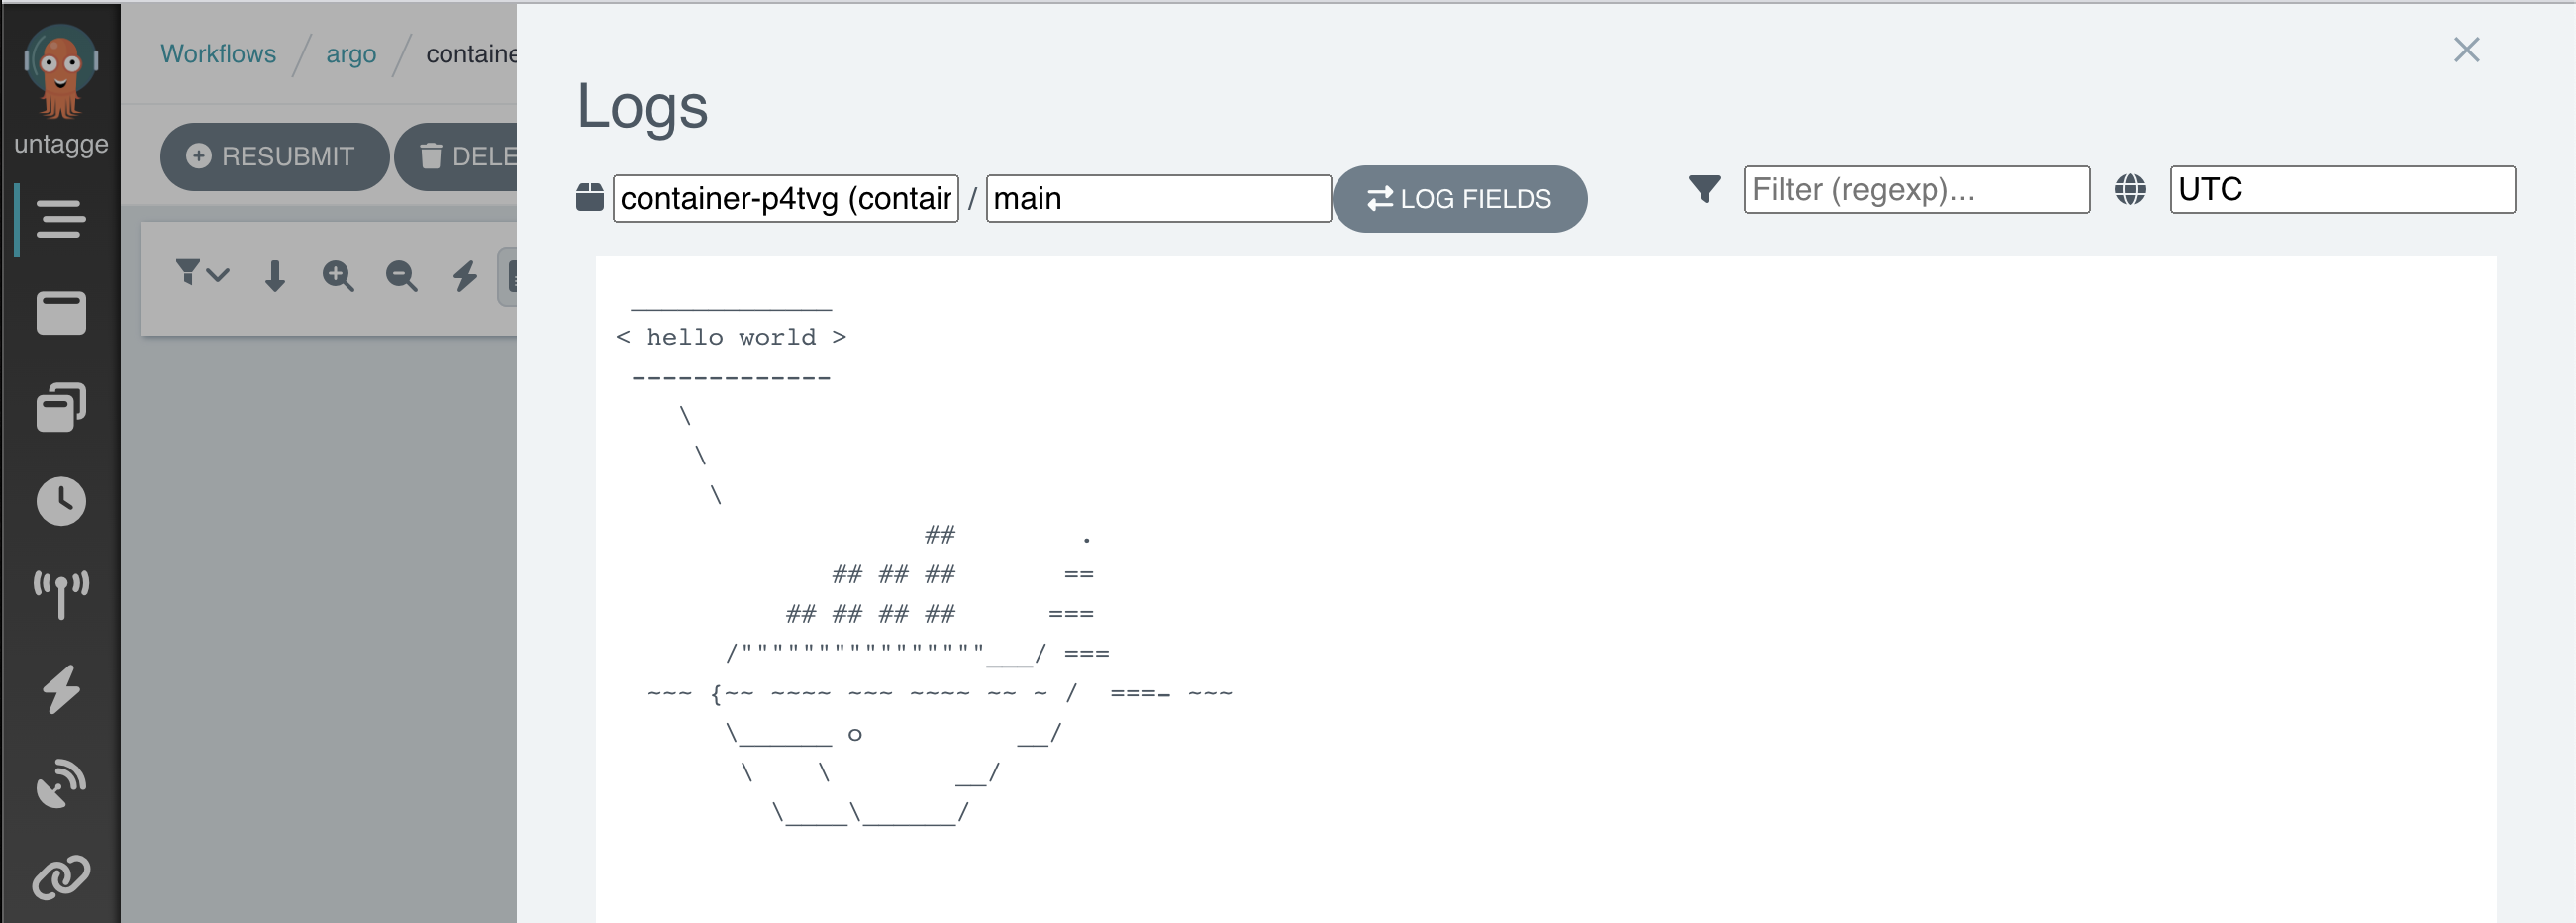
You can get the logs with:
argo logs -n argo @latest
Output
If argo was installed correctly you will have the following:
hello-world-mjgvb: time="2023-06-02T00:37:54.468Z" level=info msg="capturing logs" argo=true
hello-world-mjgvb:  _____________
hello-world-mjgvb: < hello world >
hello-world-mjgvb:  -------------
hello-world-mjgvb:     \
hello-world-mjgvb:      \
hello-world-mjgvb:       \
hello-world-mjgvb:                     ##        .
hello-world-mjgvb:               ## ## ##       ==
hello-world-mjgvb:            ## ## ## ##      ===
hello-world-mjgvb:        /""""""""""""""""___/ ===
hello-world-mjgvb:   ~~~ {~~ ~~~~ ~~~ ~~~~ ~~ ~ /  ===- ~~~
hello-world-mjgvb:        \______ o          __/
hello-world-mjgvb:         \    \        __/
hello-world-mjgvb:           \____\______/
hello-world-mjgvb: time="2023-06-02T00:37:55.484Z" level=info msg="sub-process exited" argo=true error="<nil>"
You can also check the logs with Argo GUI:
Please mind that it is important to delete your workflows once they have completed. If you do not do this, the pods associated with the workflow will remain scheduled in the cluster, which might lead to additional charges. You will learn how to automatically remove them later.
argo delete -n argo @latest
Kubernetes namespaces
The above commands as well as most of the following use a flag
-n argo, which defines the namespace in which the resources are queried or created. Namespaces separate resources in the cluster, effectively giving you multiple virtual clusters within a cluster.You can change the default namespace to
argoas follows:kubectl config set-context --current --namespace=argo
Key Points
Argo is a very useful tool for running workflows and parallel jobs
Storing a workflow output
Overview
Teaching: 5 min
Exercises: 30 minQuestions
How to setup a workflow engine to submit jobs?
How to run a simple job?
How can I set up shared storage for my workflows?
How to run a simple job and get the the ouput?
Objectives
Understand how to run a simple workflows in a commercial cloud environment or local machine
Understand how to set up shared storage and use it in a workflow
Kubernetes Cluster - Storage Volume
With Minikube, you can utilize persistent volumes and persistent volume claims to enable data persistence and local development capabilities within your local Kubernetes cluster. By leveraging local storage volumes with Minikube, you can conveniently create and utilize storage resources within your local Kubernetes cluster, enabling data persistence and local development capabilities.
Let’s create a persistent volume, retrieve the persistent volume configuration file with:
wget https://cms-opendata-workshop.github.io/workshop2023-lesson-introcloud/files/minikube/pv.yaml
It has the following content, you can alter the storage capacity if you’d like to whatever value.
YAML File
# pv.yaml
apiVersion: v1
kind: PersistentVolume
metadata:
  name: task-pv-volume
  labels:
    type: local
spec:
  storageClassName: manual
  capacity:
    storage: 5Gi
  accessModes:
    - ReadWriteMany
  hostPath:
    path: "/mnt/vol"
Deploy:
kubectl apply -f pv.yaml
Check:
kubectl get pv
Expected output:
NAME             CAPACITY   ACCESS MODES   RECLAIM POLICY   STATUS      CLAIM   STORAGECLASS   REASON   AGE
task-pv-volume   5Gi        RWX            Retain           Available           manual                  11s
Apps can claim persistent volumes through persistent volume claims (pvc). Let’s create a pvc, retrieve the pvc.yaml file with:
wget https://cms-opendata-workshop.github.io/workshop2023-lesson-introcloud/files/minikube/pvc.yaml
It has the following content, you can alter the storage request if you’d like, but it mas less or equal than the storage capacity defined in our persistent volume (previous step).
YAML File
# pvc.yaml
apiVersion: v1
kind: PersistentVolumeClaim
metadata:
  name: task-pv-claim
spec:
  storageClassName: manual
  accessModes:
    - ReadWriteMany
  resources:
    requests:
      storage: 5Gi
Deploy:
kubectl apply -f pvc.yaml -n argo
Check:
kubectl get pvc -n argo
Expected output:
NAME            STATUS   VOLUME           CAPACITY   ACCESS MODES   STORAGECLASS   AGE
task-pv-claim   Bound    task-pv-volume   5Gi        RWX            manual         10s
Now an argo workflow can claim and access this volume, retrieve the configuration file with:
wget https://cms-opendata-workshop.github.io/workshop2023-lesson-introcloud/files/minikube/argo-wf-volume.yaml
It has the following content:
YAML File
# argo-wf-volume.yaml
apiVersion: argoproj.io/v1alpha1
kind: Workflow
metadata:
  generateName: test-hostpath-
spec:
  entrypoint: test-hostpath
  volumes:
    - name: workdir
      hostPath:
        path: /mnt/vol
        type: DirectoryOrCreate
  templates:
  - name: test-hostpath
    script:
      image: alpine:latest
      command: [sh]
      source: |
        echo "This is the new ouput" > /mnt/vol/test1.txt
        echo ls -l /mnt/vol: `ls -l /mnt/vol`
      volumeMounts:
      - name: workdir
        mountPath: /mnt/vol
Submit and check this workflow with:
argo submit argo-wf-volume.yaml -n argo
Wait till the pod test-hostpath-XXXXX is created, you can check with:
kubectl get pods -n argo
List all the workflows with:
argo list -n argo
Take the name of the workflow from the output (replace XXXXX in the following command) and check the logs:
kubectl logs pod/test-hostpath-XXXXX -n argo main
Once the job is done, you will see something like:
time="2022-07-25T05:51:14.221Z" level=info msg="capturing logs" argo=true
ls -l /mnt/vol: total 4 -rw-rw-rw- 1 root root 18 Jul 25 05:51 test.txt
Get the output file
The example job above produced a text file as an output. It resides in the persistent volume that the workflow job has created. To copy the file from that volume to the shell, we will define a container, a “storage pod”, and mount the volume there so that we can get access to it.
Retrieve the file pv-pod.yaml with:
wget https://cms-opendata-workshop.github.io/workshop2023-lesson-introcloud/files/minikube/pv-pod.yaml
It has the following content:
YAML File
# pv-pod.yaml
apiVersion: v1
kind: Pod
metadata:
  name: task-pv-pod
spec:
  volumes:
    - name: task-pv-storage
      persistentVolumeClaim:
        claimName: task-pv-claim
  containers:
    - name: task-pv-container
      image: busybox
      command: ["tail", "-f", "/dev/null"]
      volumeMounts:
        - mountPath: /mnt/vol
          name: task-pv-storage
      resources:
        limits:
          cpu: "2"
          memory: "3Gi"
        requests:
          cpu: "1"
          memory: "512Mi"
Create the storage pod and copy the files from there with:
kubectl apply -f pv-pod.yaml -n argo
Wait till the pod task-pv-pod is created, you can check with:
kubectl get pods -n argo
Now copy the files into your machine with:
kubectl cp task-pv-pod:/mnt/vol /tmp/poddata -n argo
You will get the file created by the job in /tmp/poddata/test1.txt. Remember to unhide your hidden files/folders when using directory GUI. In your terminal run:
cat /tmp/poddata/test1.txt
Expected output:
This is the new ouput
Every time you want the files to get copied from your the pv-pod to your local computer, you must run:
kubectl cp task-pv-pod:/mnt/vol /tmp/poddata -n argo
Key Points
With Kubernetes one can run workflows similar to a batch system
Open Data workflows can be run in a commercial cloud environment using modern tools
Create an Argo Workflow
Overview
Teaching: 5 min
Exercises: 20 minQuestions
How can I visualize my workflows?
How do I deploy my Argo GUI?
Objectives
Prepare to deploy the fileserver that mounts the storage volume.
Submit your workflow and get the results.
Workflow Definition
In this section, we will explore the structure and components of an Argo Workflow. Workflows in Argo are defined using YAML syntax and consist of various tasks that can be executed sequentially, in parallel, or conditionally.
To define a workflow, create a YAML file (e.g., my-workflow.yaml) and define the following:
- Metadata: Provide a name and optional labels for the workflow.
- Spec: Define the workflow’s specification, including the list of tasks to be executed.
Here’s an example of a simple Argo Workflow definition, get it with:
wget https://cms-opendata-workshop.github.io/workshop2023-lesson-introcloud/files/argo/container-workflow.yaml
The container template will have the following content:
YAML File
apiVersion: argoproj.io/v1alpha1
kind: Workflow
metadata:
  name: my-workflow
spec:
  entrypoint: my-task
  templates:
    - name: my-task
      container:
        image: my-image
        command: [echo, "Hello, Argo!"]
Let’s run the workflow:
argo submit container-workflow.yaml -n argo
You can add the
--watchflag to supervise the creation of the workflow in real time as so:argo submit --watch container-workflow.yaml -n argo
Open the Argo Workflows UI. Then navigate to the workflow, you should see a single container running.
Exercise
Edit the workflow to make it echo “howdy world”.
Solution
apiVersion: argoproj.io/v1alpha1
kind: Workflow
metadata:
  generateName: container-
spec:
  entrypoint: main
  templates:
  - name: main
    container:
      image: docker/whalesay
      command: [cowsay]
      args: ["howdy world"]
Learn more about parameters in the Argo Workflows documentation:
DAG Template
A DAG template is a common type of _orchestration_template. Let’s look at a complete example:
wget https://cms-opendata-workshop.github.io/workshop2023-lesson-introcloud/files/argo/dag-workflow.yaml
That has the content:
YAML File
apiVersion: argoproj.io/v1alpha1
kind: Workflow
metadata:
  generateName: dag-
spec:
  entrypoint: main
  templates:
    - name: main
      dag:
        tasks:
          - name: a
            template: whalesay
          - name: b
            template: whalesay
            dependencies:
              - a
    - name: whalesay
      container:
        image: docker/whalesay
        command: [ cowsay ]
        args: [ "hello world" ]
In this example, we have two templates:
- The “main” template is our new DAG.
- The “whalesay” template is the same template as in the container example.
The DAG has two tasks: “a” and “b”. Both run the “whalesay” template, but as “b” depends on “a”, it won’t start until “ a” has completed successfully.
Let’s run the workflow:
argo submit --watch dag-workflow.yaml -n argo
You should see something like:
STEP          TEMPLATE  PODNAME              DURATION  MESSAGE
 ✔ dag-shxn5  main
 ├─✔ a        whalesay       dag-shxn5-289972251  6s
 └─✔ b        whalesay       dag-shxn5-306749870  6s
Did you see how b did not start until a had completed?
Open the Argo Server tab and navigate to the workflow, you should see two containers.
Exercise
Add a new task named “c” to the DAG. Make it depend on both “a” and “b”. Go to the UI and view your updated workflow graph.
Solution
apiVersion: argoproj.io/v1alpha1
kind: Workflow
metadata:
  generateName: dag-
spec:
  entrypoint: main
  templates:
    - name: main
      dag:
        tasks:
          - name: a
            template: whalesay
          - name: b
            template: whalesay
            dependencies:
              - a
          - name: c
            template: whalesay
            dependencies:
              - a
              - b
    - name: whalesay
      container:
        image: docker/whalesay
        command: [ cowsay ]
        args: [ "hello world" ]
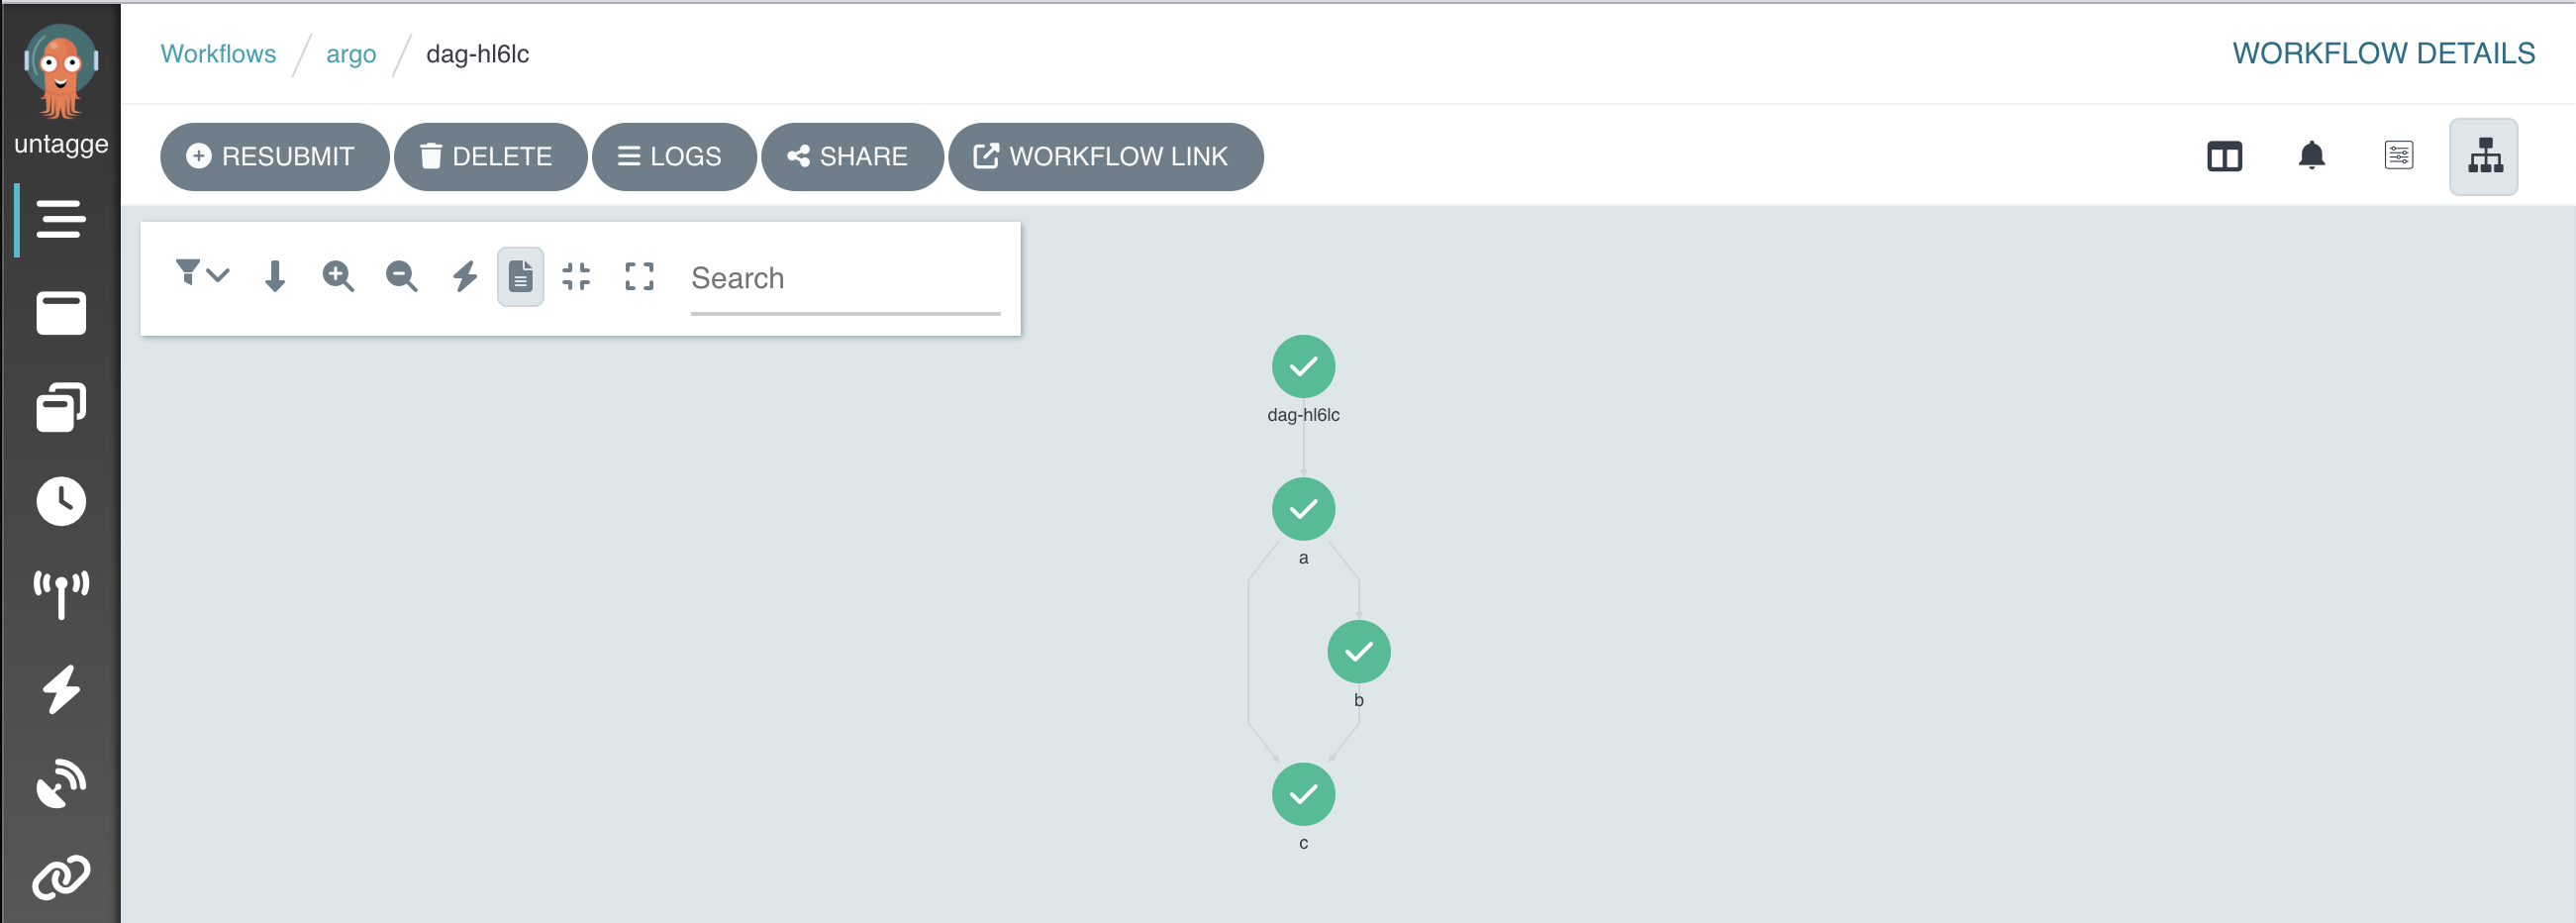
The expected output is:
STEP          TEMPLATE  PODNAME                        DURATION  MESSAGE
✔ dag-hl6lc  main
├─✔ a        whalesay  dag-hl6lc-whalesay-1306143144  10s
├─✔ b        whalesay  dag-hl6lc-whalesay-1356476001  10s
└─✔ c        whalesay  dag-hl6lc-whalesay-1339698382  9s
And the workflow you should see in Argo GUI is:
Learn more about parameters in the Argo Workflows documentation:
Input Parameters
Let’s have a look at an example:
wget https://cms-opendata-workshop.github.io/workshop2023-lesson-introcloud/files/argo/input-parameters-workflow.yaml
See the content:
Yaml file
apiVersion: argoproj.io/v1alpha1
kind: Workflow
metadata:
  generateName: input-parameters-
spec:
  entrypoint: main
  arguments:
    parameters:
      - name: message
        value: hello world
  templates:
    - name: main
      inputs:
        parameters:
          - name: message
      container:
        image: docker/whalesay
        command: [ cowsay ]
        args: [ "" ]
This template declares that it has one input parameter named “message”. See how the workflow itself has arguments?
Run it:
argo submit --watch input-parameters-workflow.yaml -n argo
You should see:
STEP                       TEMPLATE  PODNAME                 DURATION  MESSAGE
 ✔ input-parameters-mvtcw  main      input-parameters-mvtcw  8s
If a workflow has parameters, you can change the parameters using -p using the CLI:
argo submit --watch input-parameters-workflow.yaml -p message='Welcome to Argo!' -n argo
You should see:
STEP                       TEMPLATE  PODNAME                 DURATION  MESSAGE
 ✔ input-parameters-lwkdx  main      input-parameters-lwkdx  5s
Let’s check the output in the logs:
argo logs @latest -n argo
You should see:
 ______________
< Welcome to Argo! >
 --------------
    \
     \
      \
                    ##        .
              ## ## ##       ==
           ## ## ## ##      ===
       /""""""""""""""""___/ ===
  ~~~ {~~ ~~~~ ~~~ ~~~~ ~~ ~ /  ===- ~~~
       \______ o          __/
        \    \        __/
          \____\______/
Learn more about parameters in the Argo Workflows documentation:
Output Parameters
Output parameters can be from a few places, but typically the most versatile is from a file. In this example, the container creates a file with a message in it:
  - name: whalesay
    container:
      image: docker/whalesay
      command: [sh, -c]
      args: ["echo -n hello world > /tmp/hello_world.txt"]
    outputs:
      parameters:
      - name: hello-param
        valueFrom:
          path: /tmp/hello_world.txt
In a DAG template and steps template, you can reference the output from one task, as the input to another task using a template tag:
      dag:
        tasks:
          - name: generate-parameter
            template: whalesay
          - name: consume-parameter
            template: print-message
            dependencies:
              - generate-parameter
            arguments:
              parameters:
                - name: message
                  value: ""
Get the complete workflow:
wget https://cms-opendata-workshop.github.io/workshop2023-lesson-introcloud/files/argo/parameters-workflow.yaml
Yaml File
# parameters-workflow.yaml
apiVersion: argoproj.io/v1alpha1
kind: Workflow
metadata:
  generateName: parameters-
spec:
  entrypoint: main
  templates:
    - name: main
      dag:
        tasks:
          - name: generate-parameter
            template: whalesay
          - name: consume-parameter
            template: print-message
            dependencies:
              - generate-parameter
            arguments:
              parameters:
                - name: message
                  value: ""

    - name: whalesay
      container:
        image: docker/whalesay
        command: [ sh, -c ]
        args: [ "echo -n hello world > /tmp/hello_world.txt" ]
      outputs:
        parameters:
          - name: hello-param
            valueFrom:
              path: /tmp/hello_world.txt

    - name: print-message
      inputs:
        parameters:
          - name: message
      container:
        image: docker/whalesay
        command: [ cowsay ]
        args: [ "" ]
Run it:
argo submit --watch parameters-workflow.yaml -n argo
You should see:
STEP                     TEMPLATE       PODNAME                      DURATION  MESSAGE
 ✔ parameters-vjvwg      main
 ├─✔ generate-parameter  whalesay       parameters-vjvwg-4019940555  43s
 └─✔ consume-parameter   print-message  parameters-vjvwg-1497618270  8s
Learn more about parameters in the Argo Workflows documentation:
Conclusion
Congratulations! You have completed the Argo Workflows tutorial, where you learned how to define and execute workflows using Argo. You explored workflow definitions, dag templates, input and output parameters, and monitoring. This will be important when processing files from the CMS Open Data Portal as similarily done with the DAG and Parameters examples in this lesson.
Argo Workflows offers a wide range of features and capabilities for managing complex workflows in Kubernetes. Continue to explore its documentation and experiment with more advanced workflow scenarios.
Happy workflow orchestrating with Argo!
Key Points
With a simple but a tight yaml structure, a full-blown analysis can be performed using the Argo tool on a K8s cluster.
Cleaning up
Overview
Teaching: 5 min
Exercises: 10 minQuestions
How do I clean my workspace?
How do I delete my cluster?
Objectives
Clean my workflows
Delete my storage volume
Cleaning workspace
Remember to delete your workflows: Run this until you get a message indicating there is no more workflows.
argo delete -n argo @latest
Cleaning resources
In respect to K8s, deleting the argo namespace will delete all the resources created in this pre-exercise:
kubectl delete ns argo
Do not forget to download/delete any files created in your
/tmp/poddata/local directory.
Minikube - Stop your cluster
Before closing Docker Desktop, from a terminal with administrator access (but not logged in as root), run:
minikube stop
Key Points
With a couple commands it is easy to get back to square one.
